table skirting designs
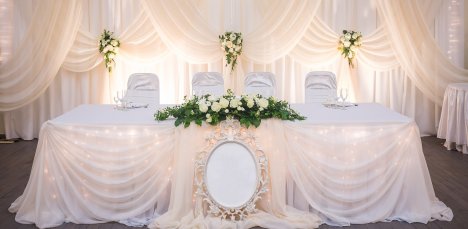
Monochromatic table skirting designs (all one color) can give a very elegant look. Begin by attaching the light UNDER the table legs. Make sure to position the table near an electrical outlet, and plug into multi-plug box that can be turned on easily with one switch. Be sure not to over load the circuits and always use wires with the UL safety rating. I use lighting with white cording. The netted fairy lights are easier, as you don't have to spend a long time weaving long strings of lights in and out of the table legs.
This starts with a sheer, white tablecloth over the table. Another sheer table covering, in a light cream, is laid over the first table and gathered up into two graceful swags meeting in the middle. A third sheer cream cloth is overlaid in the center of the table, draped over the front and puddled on the floor. A decorative mirror or picture frame in antique white is positioned on top of the puddled fabric.
Be sure to secure the chair side with table clamps or gel glue strips. Slippery fabric can slide off and needs to be secured.
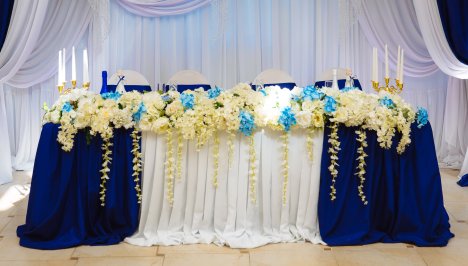
Combining two colors, such as this deep navy blue over creamy white pleating, is a gorgeous blend of colors. This table has an underskirt of pleated white, with an overlay of bold color on both ends, giving a rich contrast of two different fabrics.
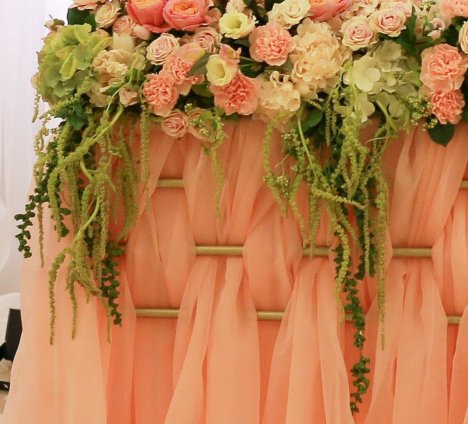
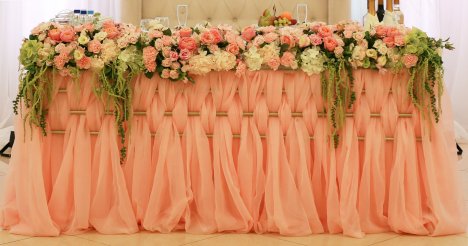
This lovely table skirting is unique with long voile scarfs weaved in and out between the gold piping.
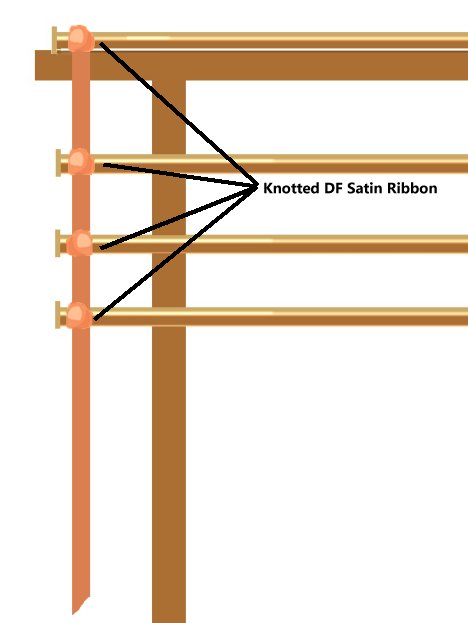
You start with four 6 foot shower rods. Create a "ladder" by tying the rods together with double faced satin ribbon in the same (or contrasting) color.
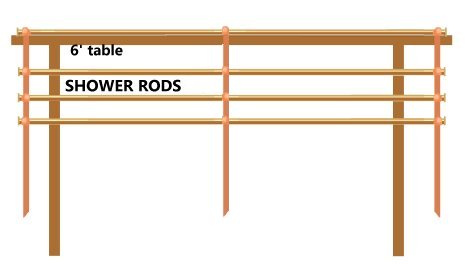
Knot satin ribbon in 5" intervals down, attaching each rod as shown. Do this for each end and the center to create a balanced "ladder" of rods, with the top one resting on the table. Measure carefully, as the rods need to be level.
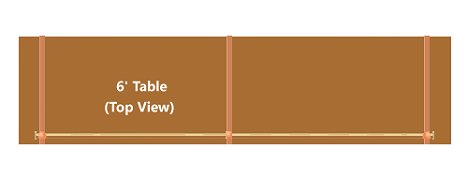
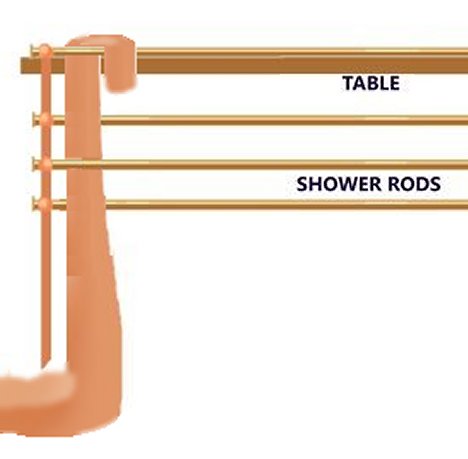
Looking down on top of the table, the three ribbons that are tied to the gold rods in the front, should lay flat on the table top, going over the edge and the two ribbons to the left and right are tied off to the legs under the table The middle ribbon can be securely fastened with duct tape to the underside of the table.
With one end of the chiffon scarf, begin from the bottom and start weaving the material in and out between the bars. Create billows on the floor, allowing it to rest on the floor and start another weave upward until you've used all of the scarving.
You can slide the material back and forth on the rods as needed for the full effect, creating soft, billowing weaving in and out the bars. Allow the folds at the bottom touch the floor.
It takes a little more effort, but the overall effect is amazing!