hand tied bouquets
Hand tied bouquets made with fresh flowers leads to a careful inspection of those blooms. Don't expect utter perfection with each and every flower. Live products are like everything else - small imperfections are the results of flowers grown in the field, packed in a foreign country and endures a great amount of shipping time and handling.
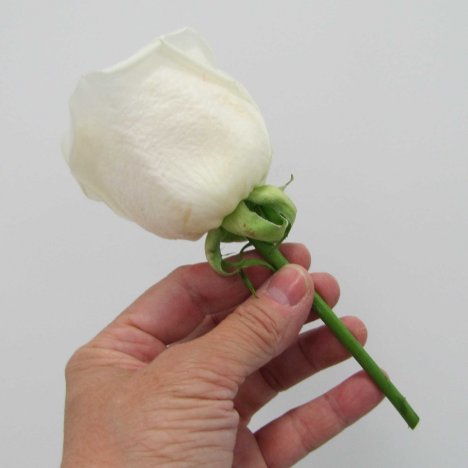
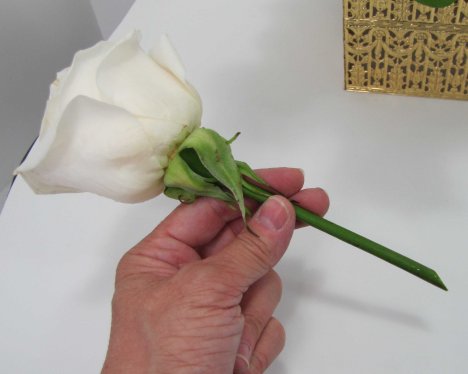
But your roses should feel firm to the touch when the bulb is lightly squeezed. If it feels squishy and the petals fall off easily, the rose is past it's prime and shouldn't be used in a wedding bouquet.
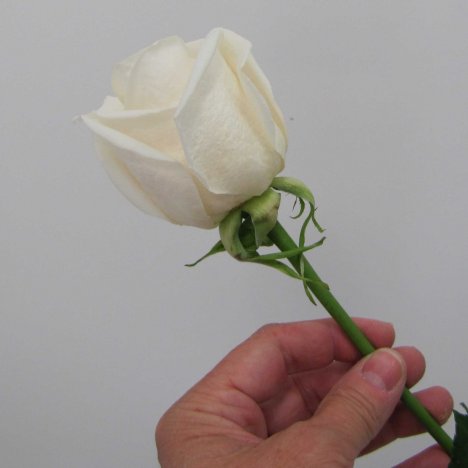
Try not to touch your flower heads any more than necessary. Oils and dirt on the hands can transfer to the rose petals and create early wilting or discoloration.

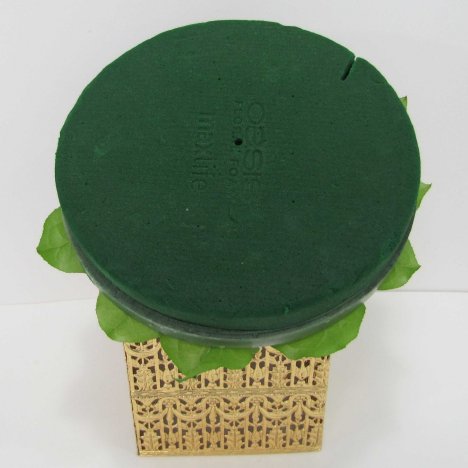
Although European holders were designed to help make flattened pave designs easier, I have found that I can use this large holder to create traditional (more rounded shape) bouquets. It distributes the weight and allows the insertions of very large flower woody stems (hydrangeas, sunflowers, etc.) without destroying the foam head.
After soaking the holder, you must find a way to support it while designing. Wet foam is heavy and can easily topple forward you are in the middle of adding flowers. Be sure to secure it in a lower, well balanced container that is weighted down with gravel or marbles.
You don't want to chance damaging your flowers if the bouquet should fall over while designing.
To create a traditional (more rounded and dome shaped) design rather than a European pave design (flat, with clustered groupings of similar flowers), you must start with longer stems.
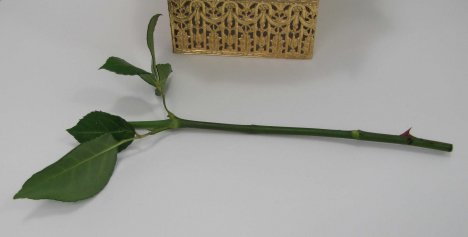
Cut your roses that are to be in the middle of the design with at least 3 inches of stem still attached.
Your rose stems should be cleaned and without thorns. Set these aside for later when you create the mock hand tied handle. Leave a few leaves up at the top to help keep the illusion of the stems still being attached to the rose heads.
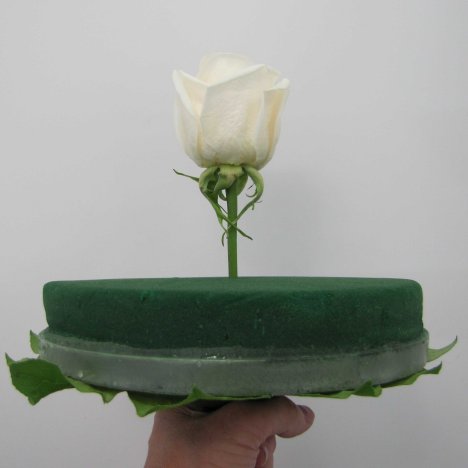
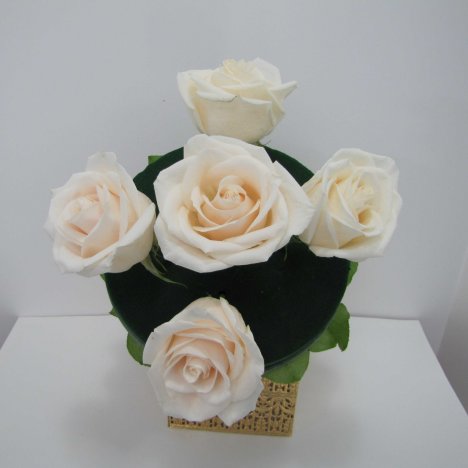
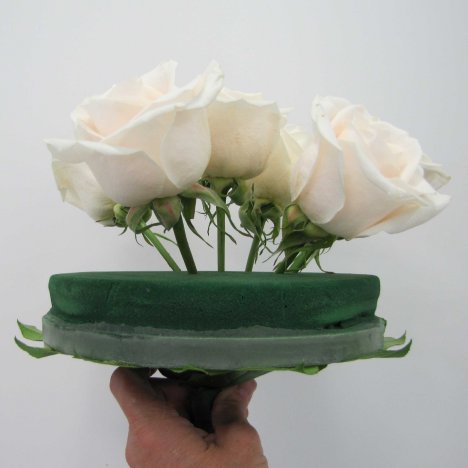
Insert the first rose deeply into the foam. This is the highest point of this bouquet and the rest of the flower heads will move outward from this point.
If you plan on solid roses, you can have the heads closer together and touching. This bouquet is going to have stock and freesia mixed in, so I'm spacing the rose heads farther apart.
You should try to insert flowers only once. Putting flowers in and then taking them out and re-inserting them puts more holes in your design and begins to degrade the foam surface.
Relax and realize that the placement of your flowers don't have to be perfectly aligned or exact. Not all flowers are exactly the same size, so let the visual placement be your best guide on working with the different blooms.
I generally place all the same flower varieties in a bouquet at the same time. In other words, I first insert all the roses, then the stock, then the freesia, etc. This allows you to fill out your design evenly.
It is important that when you ordered your flowers you counted out the number allowed for each design (including bouquets, corsages, boutonnieres, etc.) You should ALWAYS order extra to allow for wastage or a bad flower or two.
Use that guide when creating your designs. I've seen florists get a little carried away creating a bigger and larger bridal bouquet - only to run short of certain flowers needed later to finish up the corsages.
You can always ADD flowers to a bouquet later - but you certainly don't want to be taking flowers out of your design because you need them elsewhere!
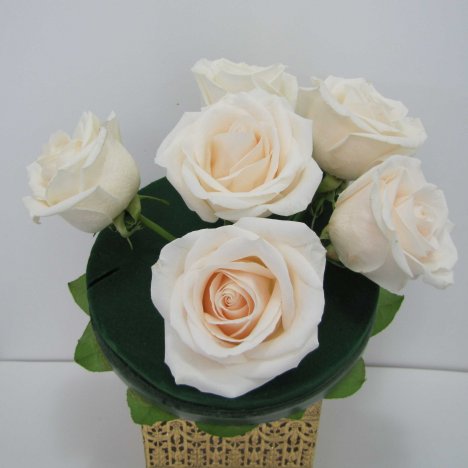
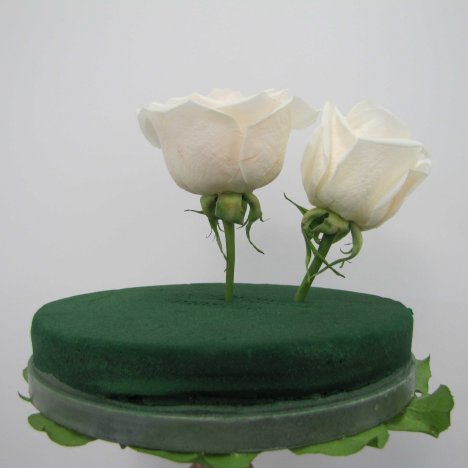
Creating a mound shaped bridal bouquet means you have to pay attention to where your flower heads are facing. The center rose is straight up, while the surrounding roses begin to angle outward from the center, their heads moving out towards the bouquet edge.
The length of your stems are going to determine the ultimate size of your bouquet. The longer the stems, the larger the bouquet. The shorter the stems - the flatter (and less dome shaped) your bouquet will be.
Insert your surrounding roses with the stems near the center rose and angling outwards.
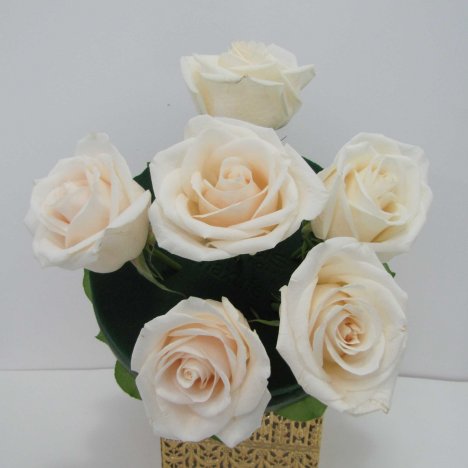
Maintain a circular shape for a traditional round bouquet. The center rose is the highest point, and the surrounding roses begin to be lower than the center rose.
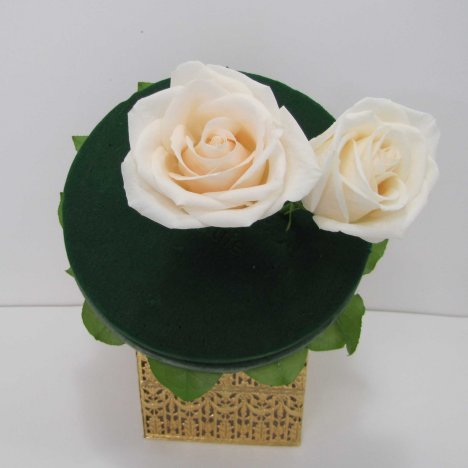
It's easier to see the mound begin to take shape from a later view of the bridal bouquet.
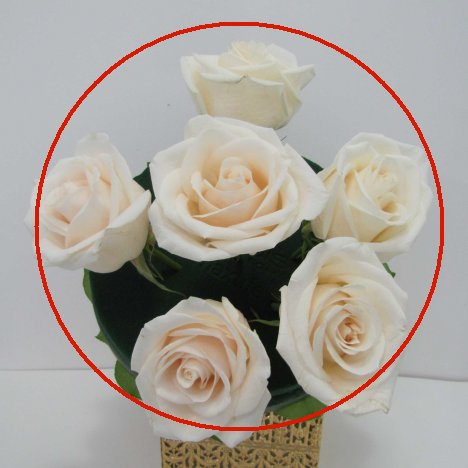
Draw an imaginary line across the top face of the roses and then see how the stems are beginning to angle outwards.
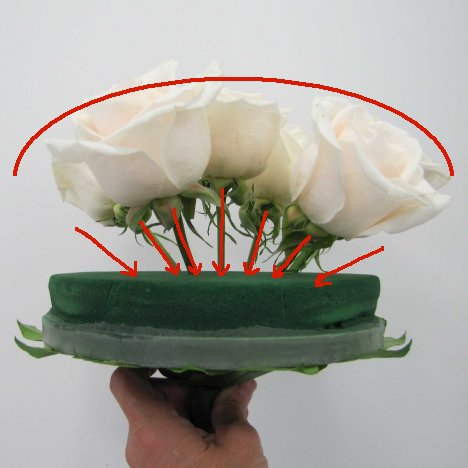
Your bridal bouquet of roses has now taken a definite circular pattern. You simply need to continue adding roses, angling the stems from the center out.