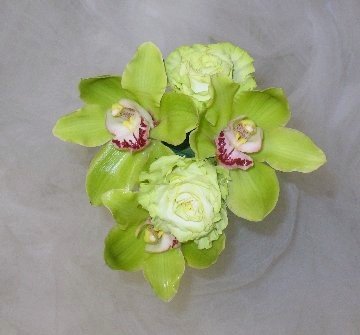
cymbidium wedding bouquet
This cymbidium wedding bouquet is going to really pop with color once we are done. To protect the petals from becoming creased, I then stick the wired orchid upright into a foam block until needed.
To place Cymbidium orchids into Oasis, florists sometimes use Cowee picks. These wooden picks have wire tightly wrapped around one end and are dyed green to blend in easily with the florist foam. You can substitute a heavy toothpick to do the same thing.
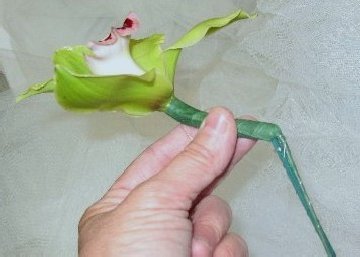
I've already ensured that the cut orchids have a water source by using wet cotton. But this slender wire may bob around a bit because the Cymbidium orchid is rather heavy. This can cause it to wallow out a larger hole in the Oasis foam.
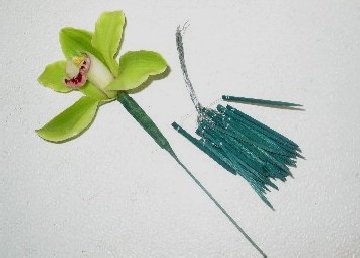
By attaching a wooden Cowee pick, I've now given the wired orchid a sturdier base. Cowee picks absorb water and then swell slightly in the foam, tightening the stem firmly into the Oasis.
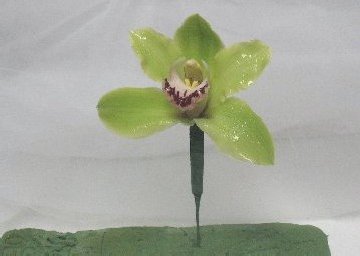
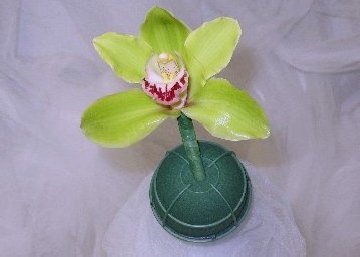
Now you have to work with flower heads to show them off to the best advantage in the bouquet. You want the "full face" of the flower to always be showing in every direction. If I plunged this wired orchid directly in - you would see the top of the orchid - not the full head.
I solve this by bending the wire before inserting into the bouquet holder.
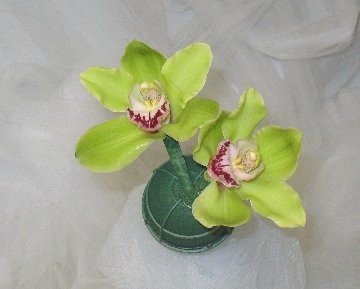
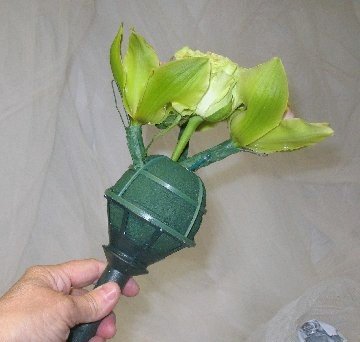
Now by looking down on the top of the bouquet you can see what the orchid looks like in the holder.
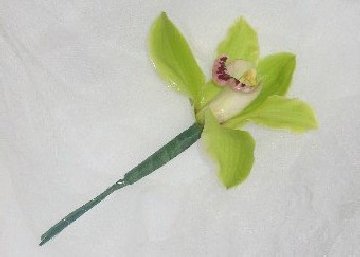
The next orchid is on a shorter wire, because I'm going to cluster it in tightly to the first orchid, slightly deeper than the first to create some depth perception. Notice I've added a Cowee pick to this orchid as well.
I start this Cymbidium orchid in the section below the first focal flower, and tilt out slightly.
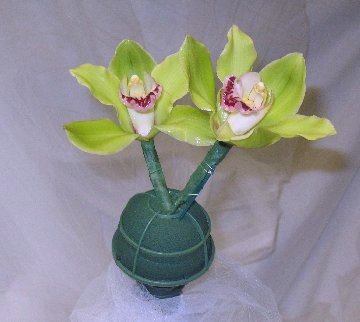
From the top view, you can see that the Cymbidium orchids touch, but I haven't crowded them so tightly that they crease the petals. As you see from this view directly above the bouquet that the heads of both orchids are shown to full advantage.
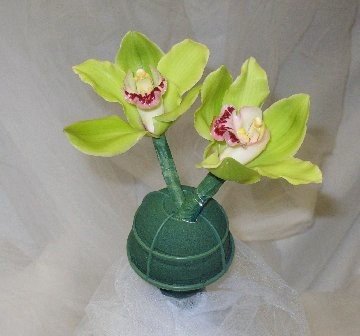
This side view shows just how far above the bouquet holder that the heads of the Cymbidium orchids actually are. If I was to plunge these flowers down until they were touching the with the undersides of the flowers, you would soon fill up the holder without room for very many other flowers.
Since this is going to be a rather large bouquet, I need to leave plenty of room to insert more flowers.
When adding green roses to this bride bouquet design, I want to be sure to allow enough stem so that I can insert it deeply enough into the foam to hold, yet still have a couple of inches above the foam level.
Before inserting the rose into the foam, remove any bruised or damaged outer petals. Always leave these on until right before using in your design, since they protect the inner rose petals.
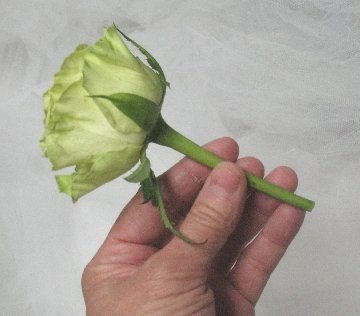
This rose is called "Jade" and adds lovely texture and color to this wedding cymbidium wedding bouquet. I insert the first green rose about 1" into the foam. If I went much deeper, I would soon have so many criss-crossed stems that I would be unable to insert any more flowers.
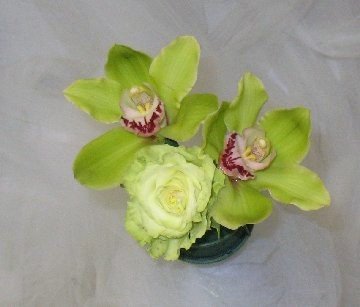
I now insert a third Cymbidium orchid down on the lower left, surround the green rose.

Here is a side view so you can actually see how much the flower heads are above the level of the foam. See how some of the stems are bent to give the full face of the flower at the best angle in the bouquet.
I now insert a second Jade rose towards the top, tucked in between two orchids and just slightly deeper, to give some texture and depth to the bouquet.
I will now move on to other flowers, inserting more green roses later into the mix of flowers.