bridal table decorations
Bridal table decorations are all about figuring out your design mechanics and being able to work on site. I like to get as much of the work greened in as possible so to save time at the reception hall.
A true showstopper as an example is the wedding table shown below. The head table looks amazing and will make a beautiful voile for the seated bride and groom.
This design can be achieved a couple different ways, as professional florists are very creative and think out of the box.
You'll need the following hard goods, flowers and greenery to create a similar look:
- 8 pink hydrangeas
- 7 blush pink standard roses
- 22 pale yellow standard roses
- 15 peach roses
- 19 red garden roses
- 6 green amaranthus
- 14 white spray roses
- curly willow branches
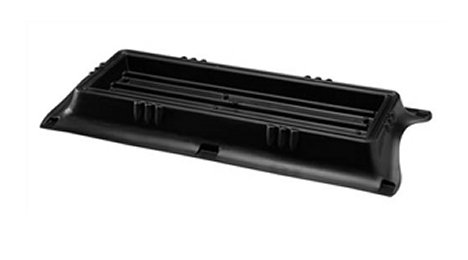
- 1 Double Casket Saddle
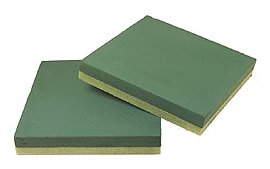
- 2 Oasis bricks
- Crystal Clear Flower Food
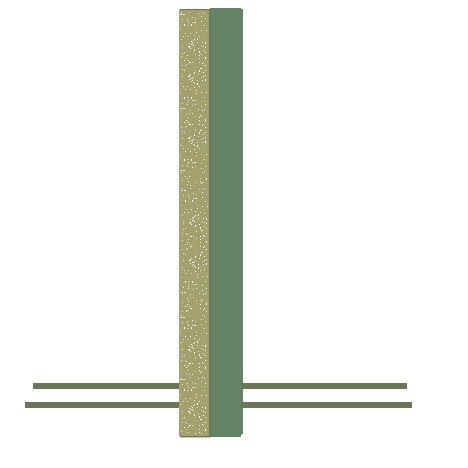
- 1 Oasis Sculpting Sheet
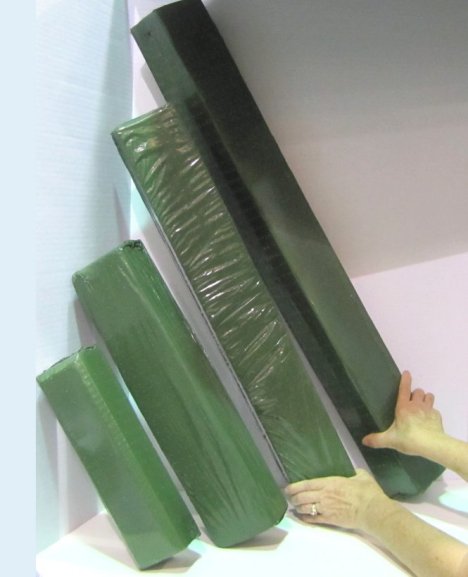
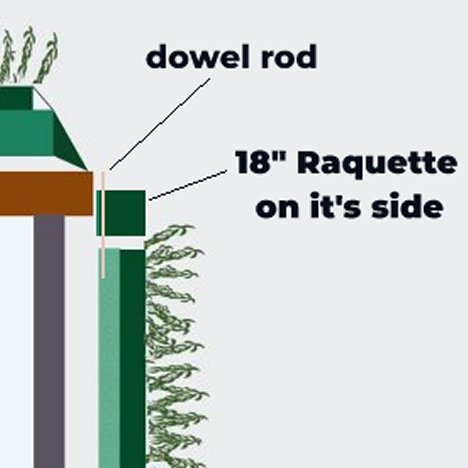
- 3 18" Raquette Bars (lattice work and one on top of Sculpting Sheet)
- 4 3/8" Dowel Rods
- Crystal Clear Flower Food
- Heavy Sand Bag, Concrete Block or Heavy Weights (filled paint cans, etc.)
PLEASE don't think you have to stay with the flower varieties and colors listed above. This recipe is all about building the structure and keeping the elements in place during the reception. Garden roses are expensive (and they only come 10 to a bunch). Replacing some of the flowers with carnations, large petal standard roses, and clusters of massed filler flowers can bring the finished price down . . . yet still have a stunning focal point for all the guests.
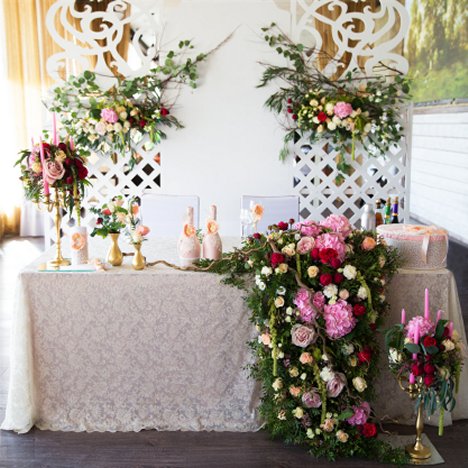
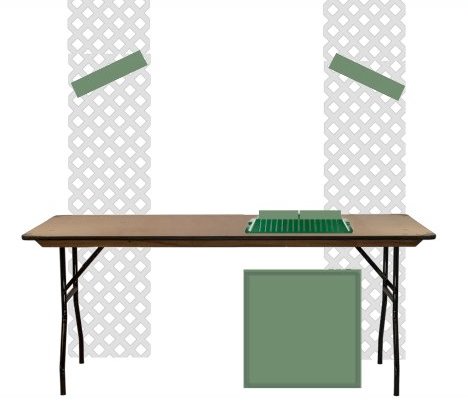
The basic mechanics are broken down as two raquettes on the backdrop, Two wedding candelabras (one on the table and one on the floor) assorted wine bottles and small nosegay vases and one large waterfall arrangement spilling over the table.
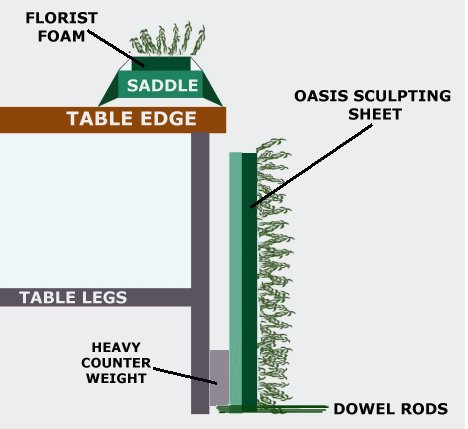
The focal design is a waterfall, meaning it looks like the flowers are one solid design that spills over the table edge onto the floor. Keep in mind that you must protect your tablecloth from the wet florist foam and the table piece has to stay in place.
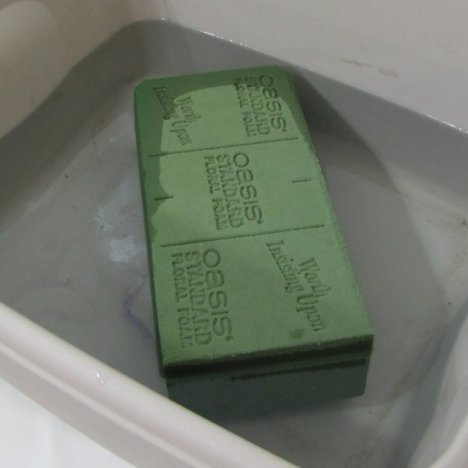
I hope this doesn't freak you out, but I use a double brick casket saddle for these type of flower designs. The molded base is designed to stay in place on slippery wood and is heavy enough to hold a large flower spray. The channels in the bottom of the tray are grooved to hold extra water - but won't leak all over the table cloth.
Soak two regular Oasis bricks in water that has been treated with Crystal Clear Flower Food.
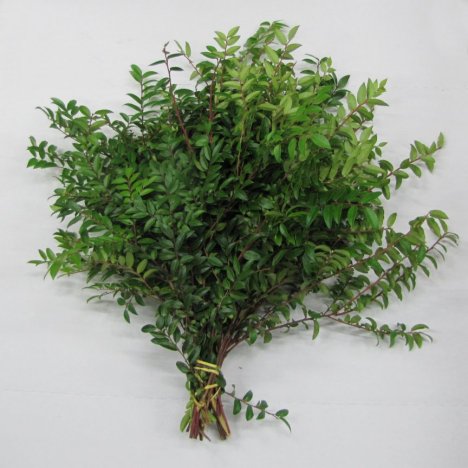
On this particular design huckleberry was used. This shows what one grower's bunch looks like. You probably want to order two or three bunches unless you add in a different kind of greenery.
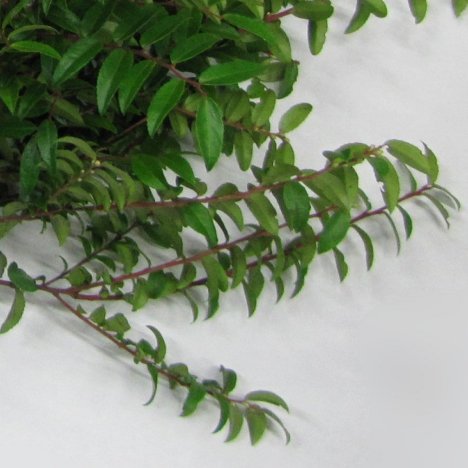
The nice long laterals can be cut shorter for the pieces on the table, although you'll need some longer stems for the fall off the table.
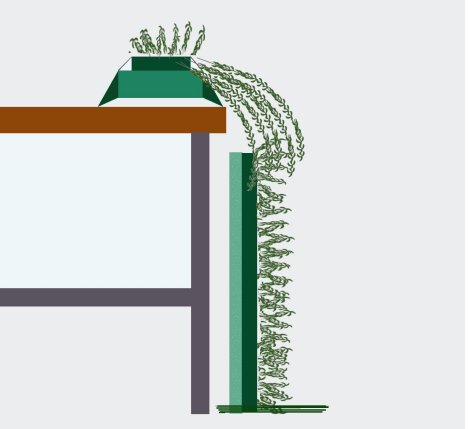
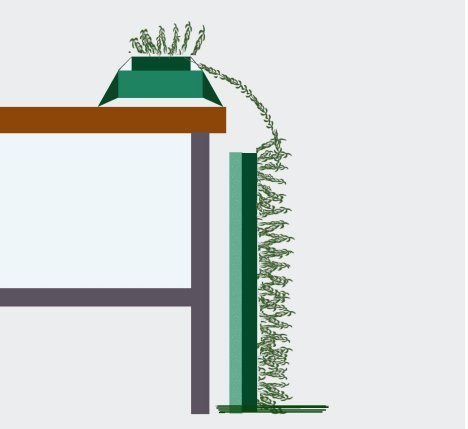
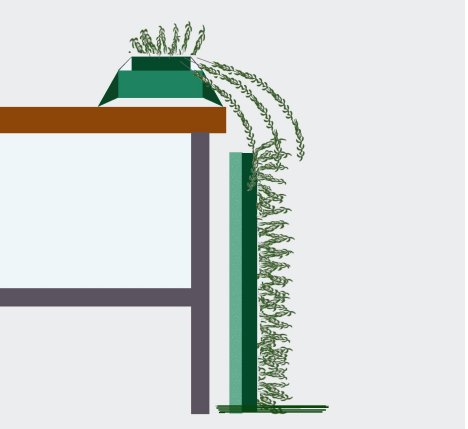
Here's what a side view looks like. You begin by greening in the saddle on top of the table. Keep the top of the design very short, as you don't want it blocking the view of the bride and groom when they are seated at the bridal table.
The sides have to be longer until it spills over the tablecloth in order to hide the mechanics.
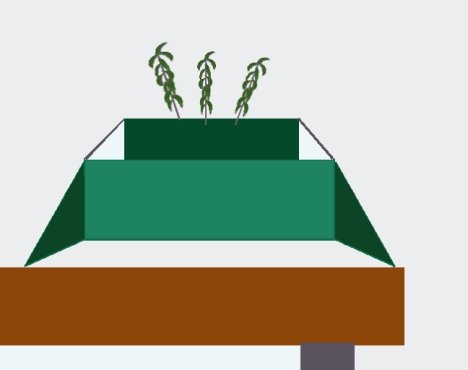
I use 22" x 22" Oasis sculpting sheets for front of the table with flower dense designs like this. You could have wired separate cages to fall off the table, but this piece is very solid and you simply need to make them self standing by using wooden dowel rods.
Raquettes are awesome for bridal tables as you can do one long continuous design down the front if you wish. For this design, however, two of the raquettes are for wiring to the backdrop and the third is optional.
These rods can be purchased at local craft or lumber yards. They come in various thicknesses. You push them through the bottom of the styrofoam/florist foam sheet at a 90* angle as shown in the picture below. Use a couple of rods so that the sculpting sheet stands by itself. The back side of the rods will be concealed by the table cloth. The front sides will be covered by the greenery.*
*You may wish to paint them dark green to blend in with the greens.

Push the dowels through the Oasis Maxlife Foam and the Styrofoam back. Insert at least four. Keep in mind that a combination of water saturated foam and fresh flowers makes for a heavy block. You don't want the arrangement to fall forward.
Therefore have your length longer on the flower heads side of the flower panel to brace against falling.
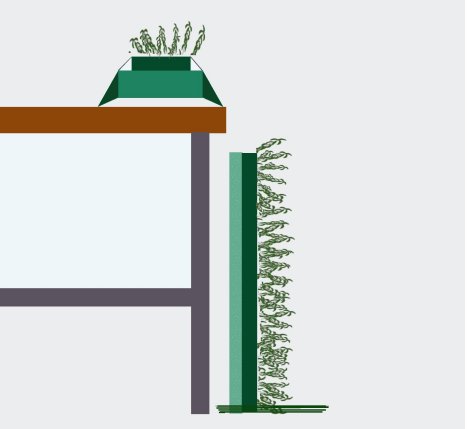
The heavy counter weight (cinder blocks, bags of flower - anything that can fit under the table and sit on top of the dowel rods coming out behind the standing sculpting sheet) will be under the tablecloth, acting as a counterweight to the flowers and greens on the front of the sheet.
Since the Sculpting sheet is 22" x 22" - it doesn't quite reach the table top. The natural waterfall design can cover this, but to add a little more foam (4"), you can simply turn an 18" raquette on it's side (with the plastic tray against the table skirt) and pin it on top of the standing Sculpting Sheet with 2 or 3 wooden stakes. This is SOOOO much easier than trying to cut a second design sheet - because it takes just minutes and saves the mess of cutting through styrofoam and florist foam.
I'm trying to show you how a professional florist "thinks outside the box" to create a structure that is solid, has plenty of wet foam to sustain the flowers and is as easy as possible to create the look you want. For me, this is much more stable than trying to hang flower cages off the edge of the table. It's so easy for the design to slide forward. By using sculpting sheets, however, the design is freestanding, which takes the weight off the table (and slippery table cloths!)
Oasis has now come out with a new product called Oasis Tile Forms. These measure 24" x 18" and give you an extra 2", but you wouldn't be able to make it freestanding because the plastic tray backing would keep you from drilling a hole through the lower portion and inserting dowels. To see just exactly what I'm talking about, check out the product video here.
You could hang small cages from the saddle to be a part of your flowers flowing over the table edge. However, with the greenery having a natural arch, you can gently bend the huckleberry, and then insert it at an upward slant in the foam.
If your foam on the table isn't high enough, you can stack another block on top of the ones in the table saddle and pin into place with dowels cut short to the top of the brick.
Now simply continue adding more (after gently bending them) longer laterals of the huckleberry greenery.

These type of bridal table decorations look as if they are all one piece, but really just have that illusion by using the florist supplies as shown.
Keep in mind that many greens are shrub plants. You will need a sturdy set of bunch cutters or pruners to cut through the woody stems of the greenery. It can really dull a floral knife or cause a slip with a danger of cutting yourself.
The convenience of having separate design structions is that they are much easier to transport.