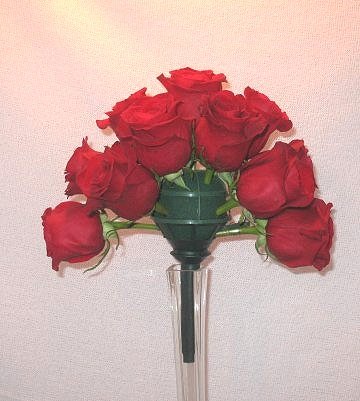
red rose wedding bouquet
Learning how to make bridal bouquets can save you quite a bit of money on your wedding budget. But you must evaluate carefully your willingness to put this much time and effort in making your own wedding flowers.
This bouquet tutorial is for the traditional round, hand-tied wedding bouquet of roses. The fun part is that this bouquet is actually made on a bouquet holder (making it much easier for the placement of the flowers) . . . yet looks just like a real hand tie.
Don't feel you have to limit yourself to the same colors (or even just roses!) to make this bouquet succeed. Reviewing the basic steps of design will show you a great deal of what a florist does to create those beautiful flowers!
For this tutorial, you will need:
- 24 - 28 Dark Red Roses (varies because of size of flower heads)
- 1 OASIS Belle Bouquet Straight Holder
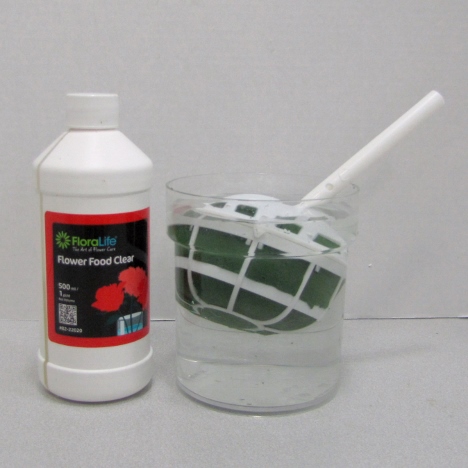
- Crystal Clear Flower Food
- A sharp Florist Knife
- Cling (Florist Clay - Green)
- Floralock Stem Adhesive
- Finishing Touch Spray
- Pearl Headed Corsage Pins
- Soft Ribbon for Handle

You begin by choosing the right bouquet holder for the job. Please don't skimp and go too small. The life of the flowers depends on the size of the foam. Trying to cram too many into a small piece of foam breaks up the foam and will have the flowers wilting for lack of water. The size of the bouquet will depend on the size of the head of foam.
Belle Bouquet holders are available in white, chosing a slanted for cascades and straight handles (for round designs). For this tutorial I have chosen a straight holder.
Begin by soaking in water properly treated with professional flower food. This product costs very little and goes a long way towards keeping your flowers as fresh as possible for a longer period of time.
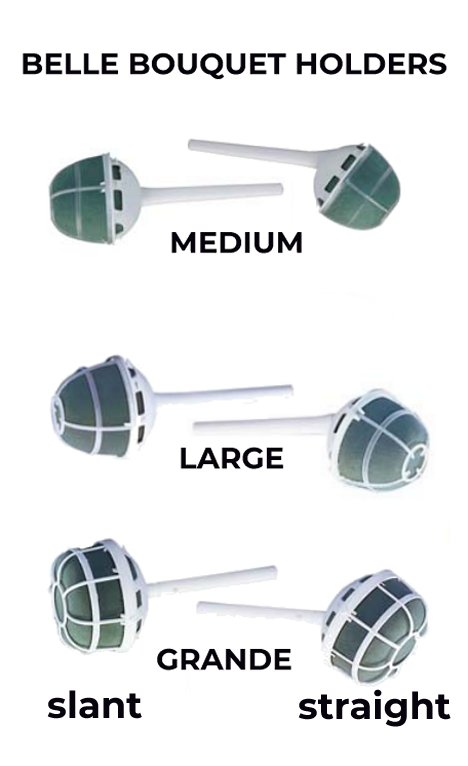
(The pictured green holder is no longer available. Substituted for the tutorial is the Grande White Bell, straight handle).
Be sure that the holder is securely held in a tight necked vase. You can weigh down with marbles, rock or other heavy material. The goal is to ensure the holder doesn't topple forward, will possibly creasing or damaging delicate flower petals.
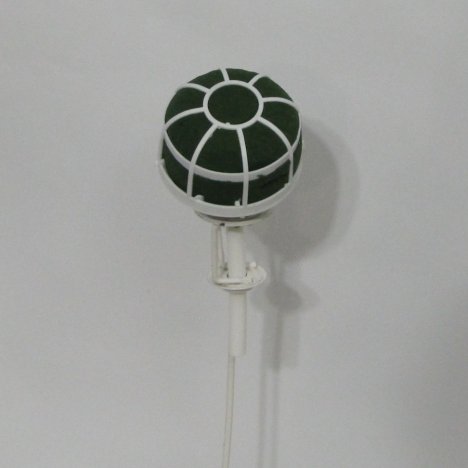
Always begin by float soaking the holder, allowing it to sink gradually into water treated with Crystal Clear flower food. Don't force the head under water, because this could cause dry pockets in the foam that will deprive some stems of water, causing them to quickly wilt after being removed from the refrigerator or other cold storage.
Flowers should always be inserted about 1 to 1 1/2 inches into the foam head. They should feel secure - but not too deeply buried.
If you insert the stems too deeply, you will begin to run into trouble of the stems hitting other flower stems, which will cause you to pull out and re-insert again.
It is important to try to insert ONLY ONCE - to maintain the integrity of your foam.
When you processed the roses, you should have left on the outer guard petals, even if they look bruised or torn. This protects the inner petals until you are ready to make your bouquet.
Remove those guard petals now, taking off anything that doesn't look good. If you wish, save the better petals for use on bridal tables, around cakes, flower girl baskets and other decorative ideas.
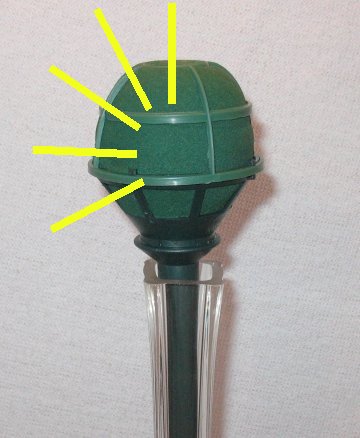
I begin by inserting the rose dead center in the top of the bouquet holder. Be sure to clean off any thorns on your rose stems so they will not tear up your OASIS foam when inserting.
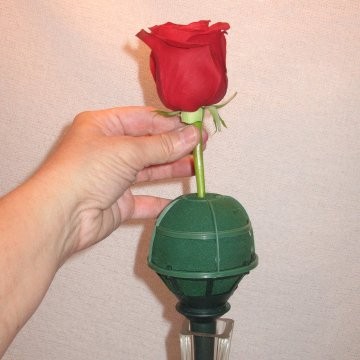
The length of your stem will determine the final size of the bouquet. Longer stems will mean a bigger bouquet, shorter stems for a smaller bouquet. The stems should be inserted about 1 1/2 inches into the foam.

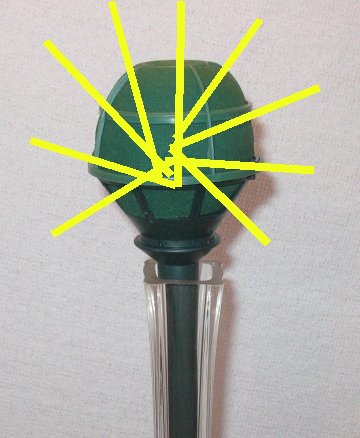
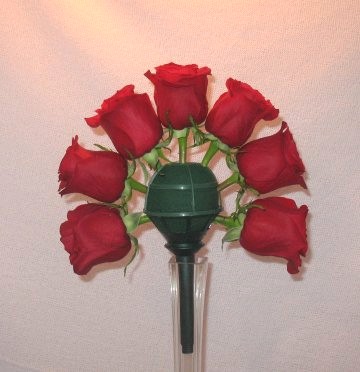
The flower heads should touch each other and begin to angle outwards. Now you can start at the top, encircling the center rose and spiraling outward.

I'm showing the side insertions so you can see each rose stem inserted into the foam. Continue to add roses, keeping all the flower heads level with one another for this design.

You can keep your bouquet round by keeping your rose heads level with one another.
By inserting all the roses the same depth, you will maintain a rounded shape. The final roses around the bottom will need to be a slightly longer length, so it finishes as a perfect half circle.

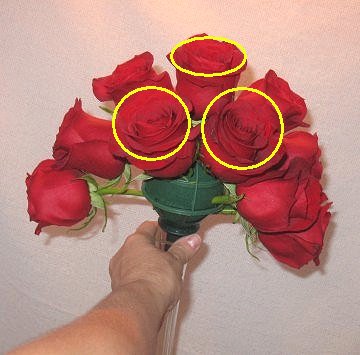
Once your first line of roses has been completed, you now will have a guide for inserting the rest of the flowers. Start in the middle and begin inserting more roses, filling in with the heads touching the others and leaving no gaps.
If you want a "half round" look, simply give your roses on the bottom a bit longer stems as shown.

Note that the flowers on the top face straight up, and the flower heads begin curving outwards as you move down the bouquet.
Be careful as you fill in the flowers, because at this stage the bouquet begins to get heavier. The roses will not be totally secure until you squirt Floralock in among the stems.
Flipping the bouquet around too roughly may cause you to lose a flower out of the bouquet.