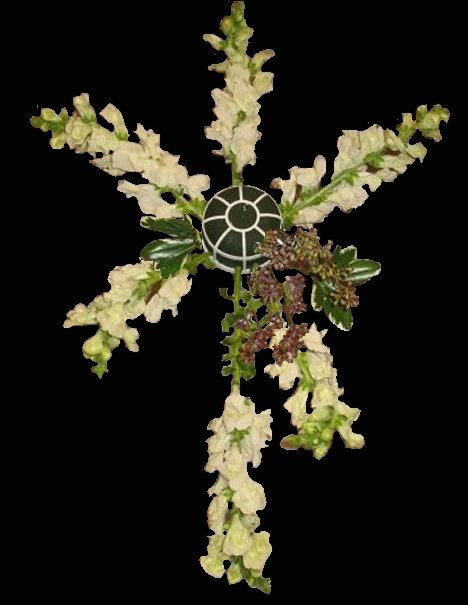
orchid wedding bouquet
This orchid wedding bouquet is easier to design than it looks. Don't let the thought of working with orchids scare you off. They are tougher than they look! Enjoy this step by step tutorial taking you through the process.
For this design, you'll need the following products and fresh flowers:
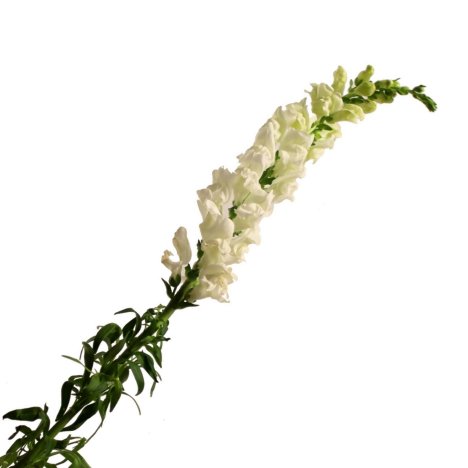
- 6 stems of snapdragons
- 2 cymbidium orchids
- 5 stems dendrobium orchids
- 1 stem hypericum berries
- 6 stems of flat fern
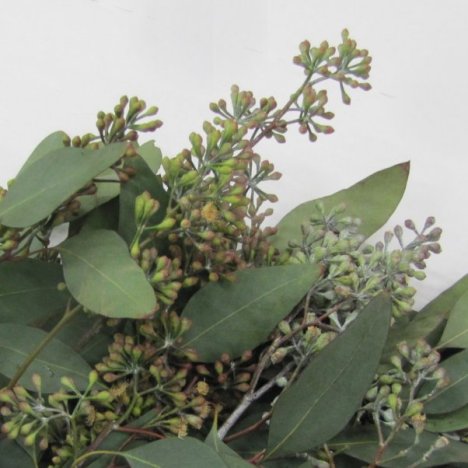
- 1 stem seeded eucalyptus
- 1 stem variegated pittosporum
- 5 - 6 blades of Lily Grass
- 1/3 stem ming fern
- 1 box stephanotis
- 20 stephanotis stems
- Slanted Grande Belle Bouquet Holder
- Floralock Stem Adhesive
- Finishing Touch Flower Sealant
- Crystal Clear Flower Food
- Floral Knife

It's a good idea to wash your hands before handling any type of orchids. Oil from your fingers can mar the petals or cause early browning. Lightly mist your fingertips with Finishing Touch before removing them from the box.
Take the time to familiarize yourself with the correct way to process your wholesale wedding flowers. All wedding flowers will last longer is you use some of the basic products professional florists use to keep their designs fresh.
Home air conditioners and refrigerators deliberately remove moisture from the air. Floral coolers add a great deal of moisture to the air. You can compensate by running a cool mist humidifier and misting your flowers with Finishing Touch once a day.
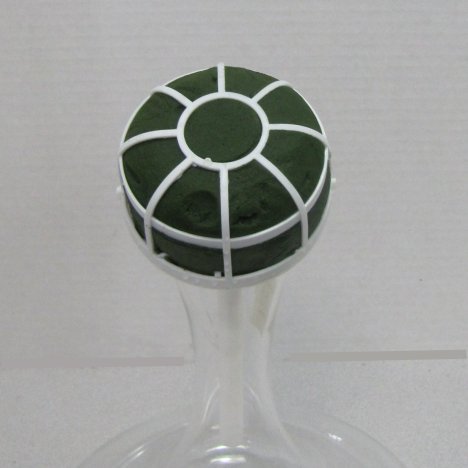
Float soak your Belle Bouquet holder in water that has been treated with Crystal Clear Flower food. Allow the foam to absorb the water slowly, rather than forcing it under the water line. This can cause dry pockets of foam that could cause the early wilting of any flower stem inserted into it.

Secure your soaked holder securely in either a narrow necked vase or a stand. Weight the holder down securely with marbles or rock so that the bouquet does not topple forward during the designing. The petals can become creased or marked if they fall on their face on a counter top or floor.
I'm using a long snapdragons to fill out the outer perimeter of my orchid wedding bouquet, thus setting the size of the final design. I'm using a minimum of bulk greenery, which is what usually determines the dimensions of a bouquet.
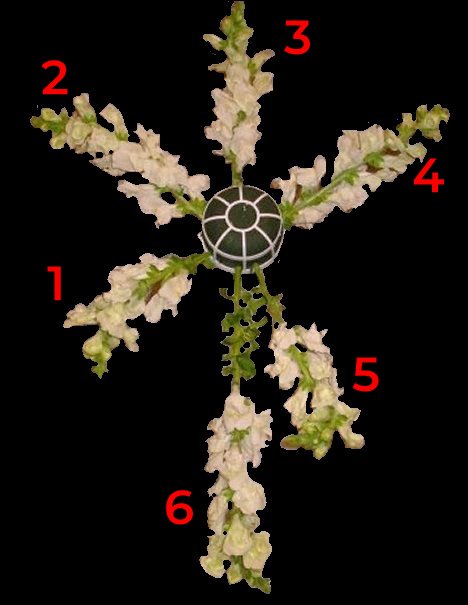
Circle around the perimeter of this orchid wedding bouquet with your shortened snapdragons. Stems 1, 2, 3 and 4 are approximately the same length. Strip off the lower leaves and hold the stems against your bouquet holder, gauging where you want to cut the stem. Use a floral knife to give your snapdragon stem a sharp angled cut for easy insertion into the florist foam.
Do not use regular scissors to cut your flower stems. They can pinch and crush delicate stem cells, making it hard for the flower to draw water up to the flower heads.
Stem 5 is a bit longer than the first four stems, with stem 6 being the longest and setting the length of your bouquet's cascade.
I love mixing up different greenery for different variances in color and texture. One of my absolute favorites is seeded eucalyptus. This tough flower stays fresh for very long, eventually turning into a dried green.
Variegated pittosporum has nicely rounded petals with a waxy feel to them. They come on a tough woody stem and is available in both variegated and solid green.
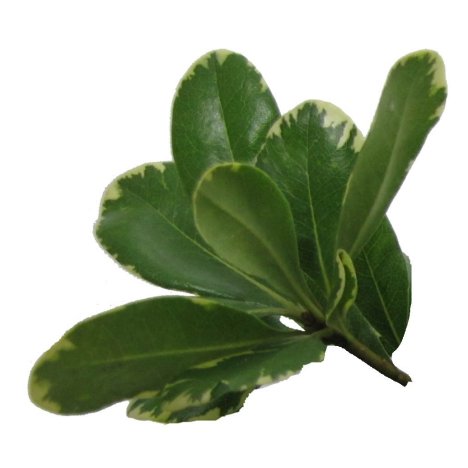
I set aside the leaves of the eucalyptus for both boutonniere and corsage work instead of using them in this orchid wedding bouquet. Feel free to use them if you wish. They can also be used to glue on the backs of your bouquet holders for a nice finished look if you wish. I inserted a couple of short cuts of pittosporum on the left side and the lower right. Then I placed a cluster of the seeds from the eucalyptus in the lower right, allowing them to drape down nicely.