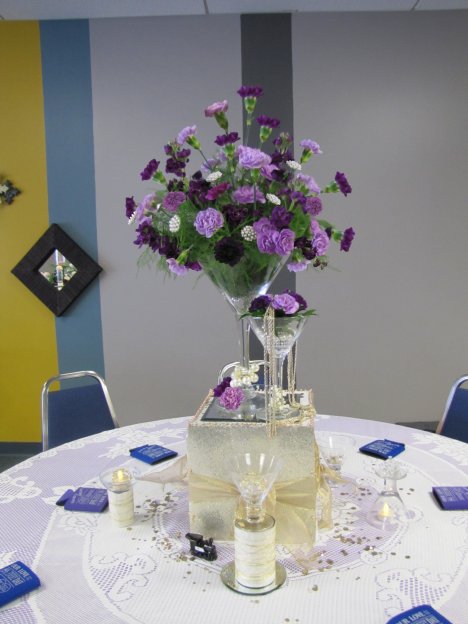
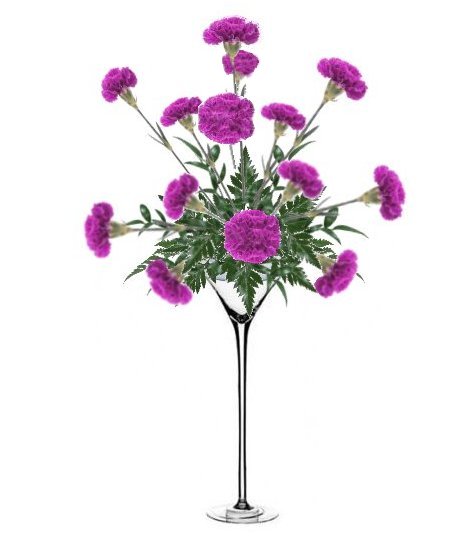
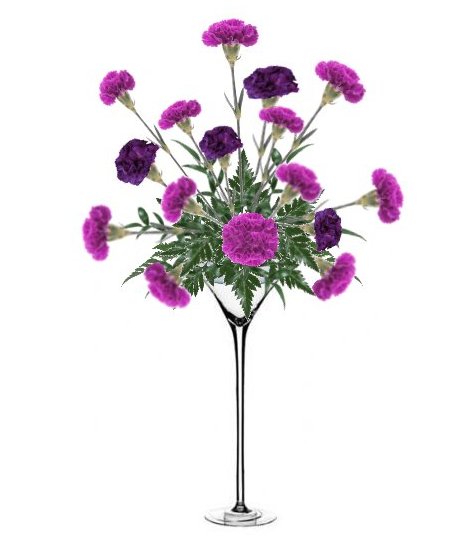
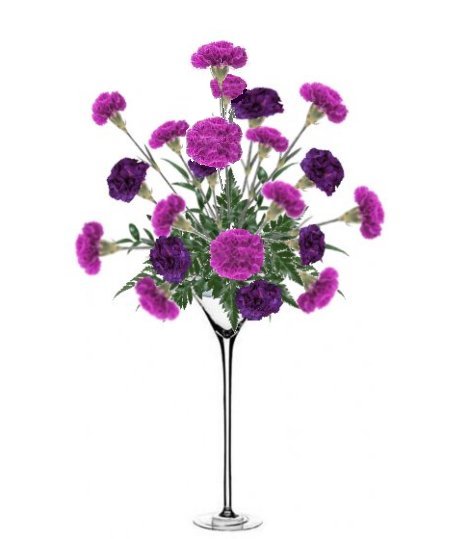
Martini glass centerpiece
This martini glass centerpiece is designed with about 24 - 25 standard sized carnations. You can mix and match colors, and even choose a different flower variety. Good choices would be roses, alstroemeria, daisies, or other flowers with long stems. This tutorial is simply to demonstrate the flowering process.
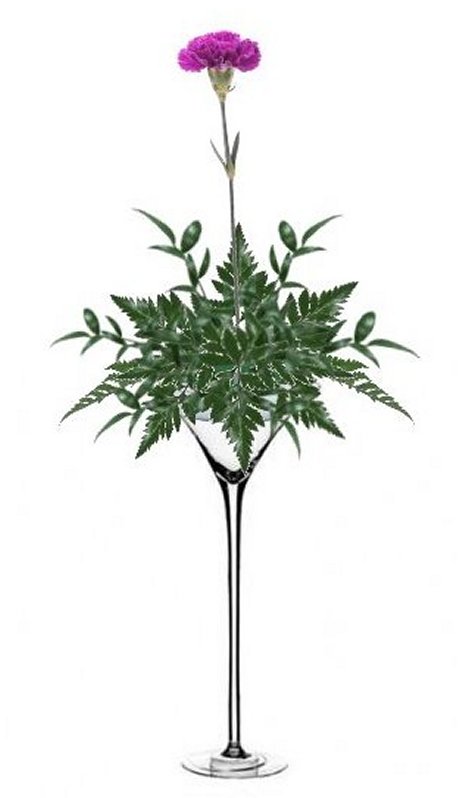
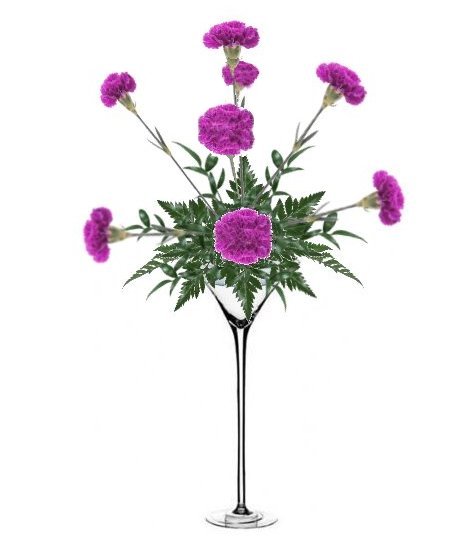
I start with one tall flower in the center. If you want your martini glass centerpiece to look balanced, make this first stems roughly the length of the martini glass from table to rim.
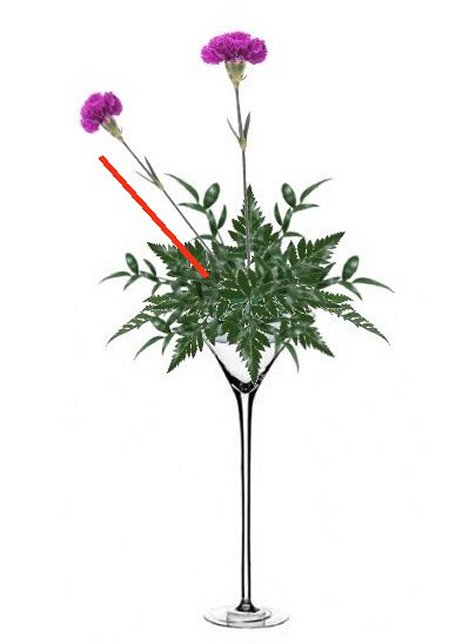
I place my second carnation at roughly a 45 degree angle from the first flower.
Do the same on all four sides. If you want a smaller arrangement, shorten the stems. These blooms are what is determining the overall height and width of your centerpiece.

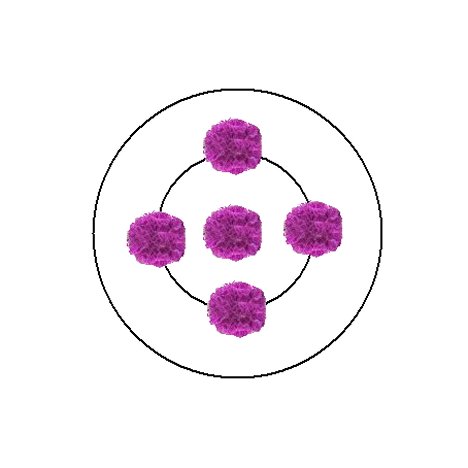
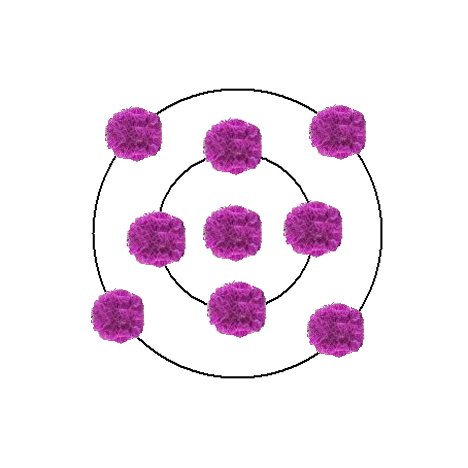
The top view looks roughly like this.
Now place four more carnations at a 90 degree angle from the first carnation, and stagger these between the spaces of the four flowers above them.
The top view now looks like this. You are simply moving downward, staggering the flowers in between each other and the heads are starting from straight up, to 45 degree out and finally straight out the sides of the bottom insertions.
Now I begin inserting more stems, but shortening these flowers somewhat. This will add some depth perception to the piece, which is more visually appealing than a perfect ball of flower heads with a center of stems.
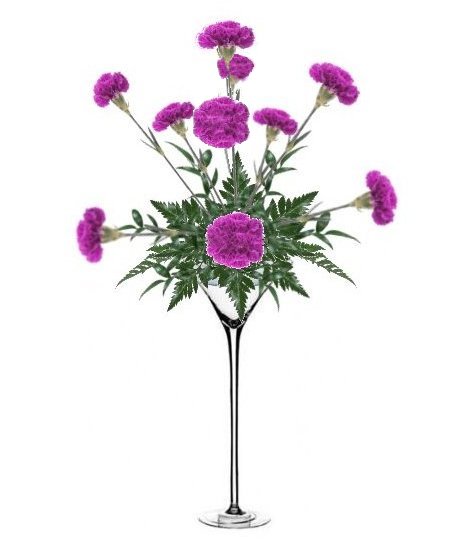
I now have 13 stems of carnations, with the middle four shorter than the first 9 stems.
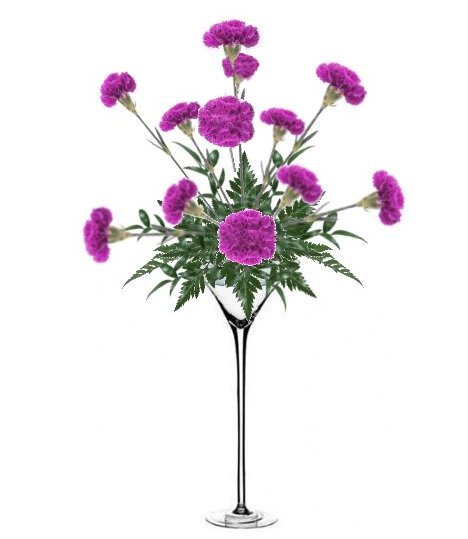
Now I'm inserting 4 more short carnations around the rim of the glass, almost pointing completely downward. We now have 17 stems in this martini glass centerpiece.
I want a little more depth contrast, yet the bride wanted an all purple centerpiece. So I went a shade darker and began inserting them in between the flowers already in place.
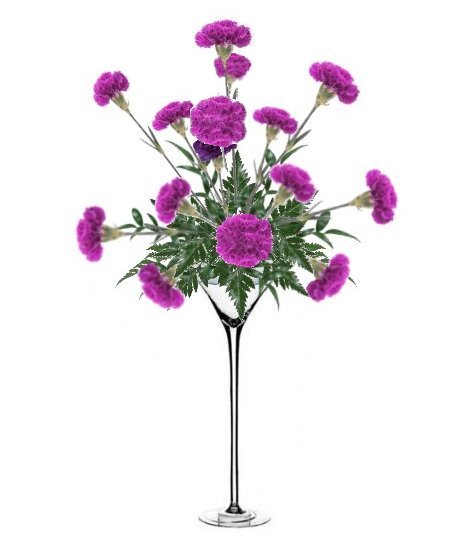
These flowers don't have to be perfectly mirrored in length, just cut them to assorted sizes and keep a fairly balanced look all around the martini centerpiece.
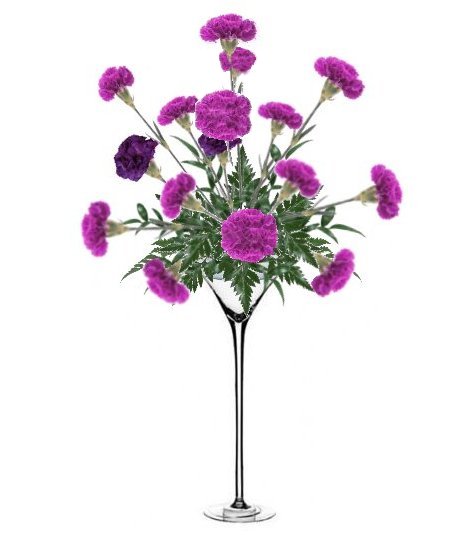
You can see how going a little darker with the color instantly creates a marked difference.
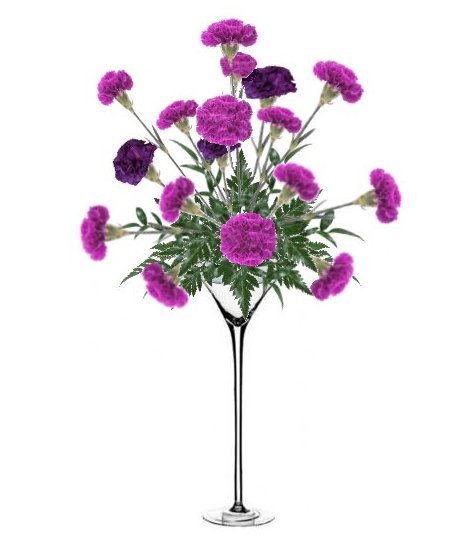
I keep turning the martini vase, wanting to be sure an see all the "holes" in between the flowers that I need to fill.
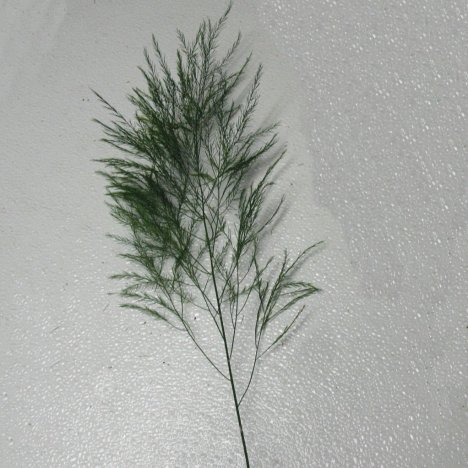
If you wish, you can add a third filler flower (such as wax flower or baby's breath) or a lightweight feathery fern such as tree fern.
You can place this on the table as done or add in more flowers. The look of the final centerpiece is up to you.
In this vase, I added a lot more carnations, with tree fern and then put in some flower jewelry for a touch of sparkle. For more height, I placed it on a elevated box so it wouldn't intrude on the guest's vision.