make a bouquet
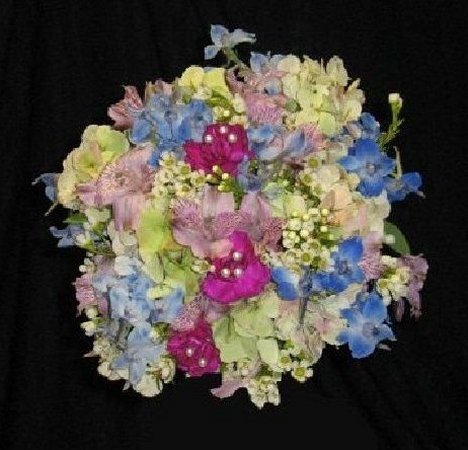
Learning how to make a bouquet is just a matter of balancing your flower colors and textures. You can make your bouquet all one flower, but if you prefer a little more variety, check out the pictures below!
For this particular bouquet you will need:
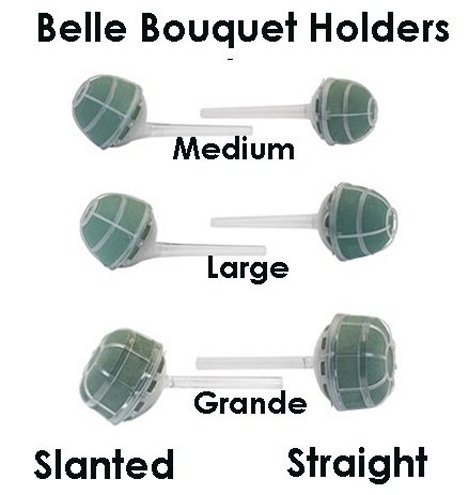
- 1 Wedding Bouquet Holder
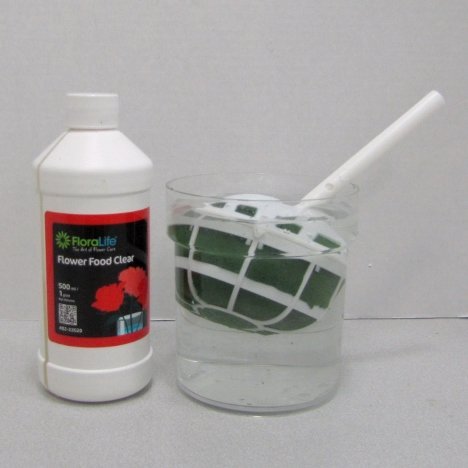
- Cut Flower Food
- 2-3 Stems White Wax Flower
- 1 Stem Dark Pink Miniature Carnation
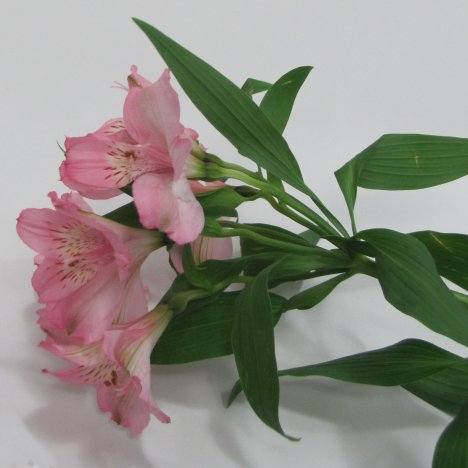
- 5 - 6 stems Light Pink Alstroemeria
- 1 Green Hydrangea
- 3 stems Blue Delphinium
- Finishing Touch
- Pearl Headed Corsage Pins
- Finishing Touch Flower Sealant
- Floral Knife
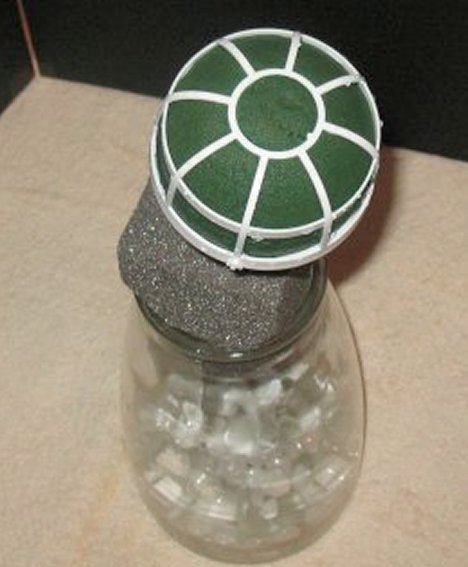
- Narrow Neck Vase filled with sand or marbles

Wedding bouquet holders come in all styles and colors. I used a Grande Belle for this tutorial, because I always like the most wet foam it can get to keep the flowers as fresh for as long as I can.
Allow the holder to "float soak" and sink naturally in water treated with flower food. Don't skim on the professional flower products. Florists use these types of products faithfully because they've proven to keep flowers fresh longer.
Treat your expensive investment of wedding flowers the way a professional would treat them.
Once the foam head is heavy with water, secure in a narrow necked vase weighted with rock or marbles. Wet foam and flowers are a heavy combination and you don't want your flowers toppling forward as you are designing.
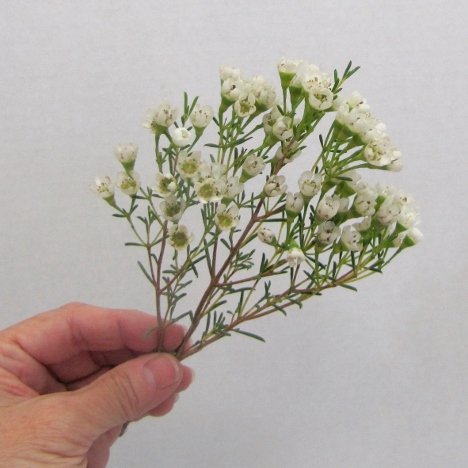
Wax flower is a delightful filler flower - often considered as a nice change from the traditional Baby's Breath. This is a grower's bunch. Wax flower is not usually counted a bunch by number of stems, but by weight since this is more of a shrub.
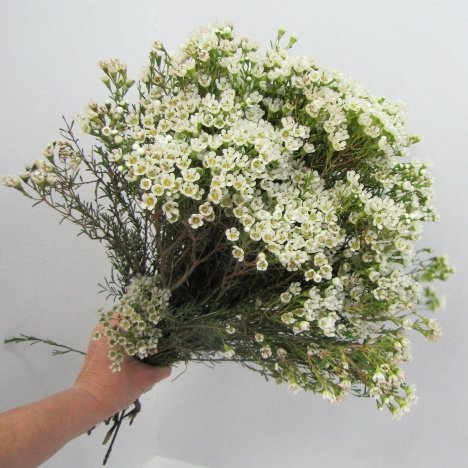
Cut the laterals apart and strip off the thin greens off the woody stem, giving you a stem to insert into the bouquet holder.
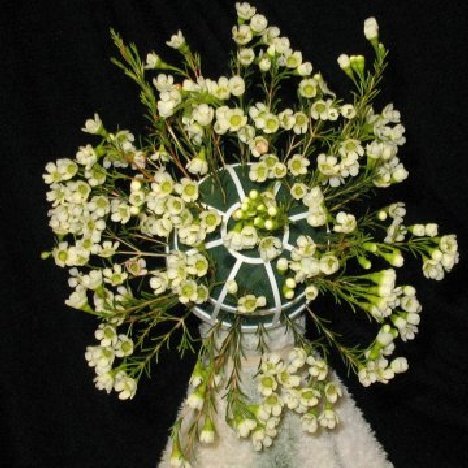
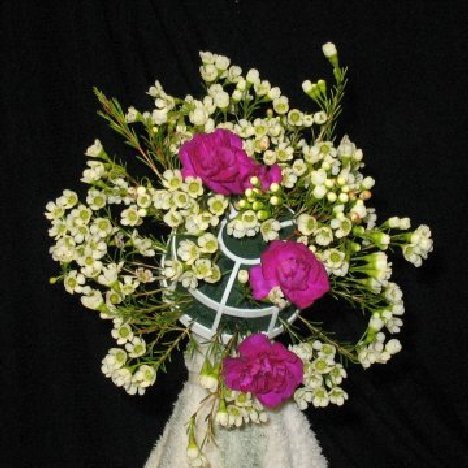
After securing the saturated bouquet holder in the vase, I begin to frame in the size of the bouquet by creating a round perimeter with the wax flower.
Normally this would be done with greenery, but this an old-fashioned Colonial Bouquet, which is a cluster of old fashioned garden flowers and usually doesn't have greenery in the design.
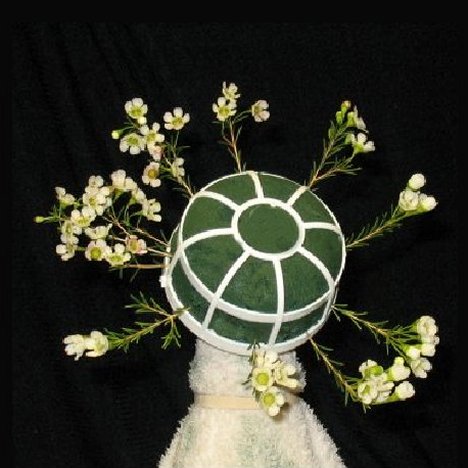
Fill in lightly with sprigs of the wax flower, but don't crowd them too closely - you still have several other flowers to add to this mix.
After I've framed in the size of the bouquet with the wax flower, I'm going to use hot pink miniature carnations to add some bold color to the center of this lovely bouquet.
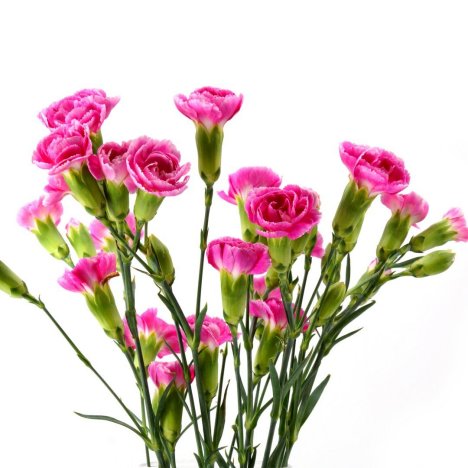
Don't feel you have to make a perfectly balanced "triangle" with the carnations. I wanted my bouquet to have more of the feel of a freshly picked garden bouquet with a random sort of feel to it.
I'm now going to add some lovely pink alstroemeria (also commonly known as "Peruvian Lilies"). This delightful little flower comes in a large range of colors, including different shades of pinks, yellow, white, orange, purple and lavender.
It holds up well in bouquet, corsage and boutonniere work. The single stem usually has between 3 to 5 blooms on each stem and a grower's bunch comes in ten stems.
Cut the laterals of each lily head off with a sharp knife. Take care, gently pushing them into the foam with your fingers close to the foam.
You don't want to jam them in too quickly or you could easily crush the delicate stem and make it hard for the bloom to drink water out of the florist foam.
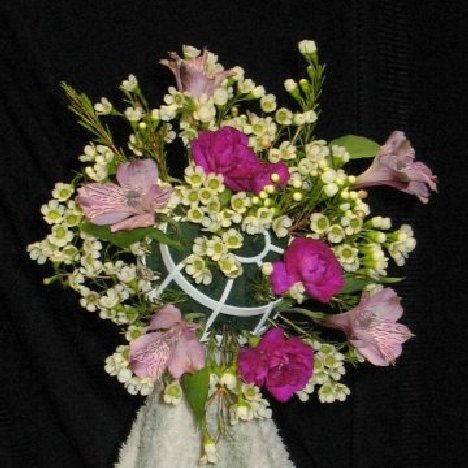
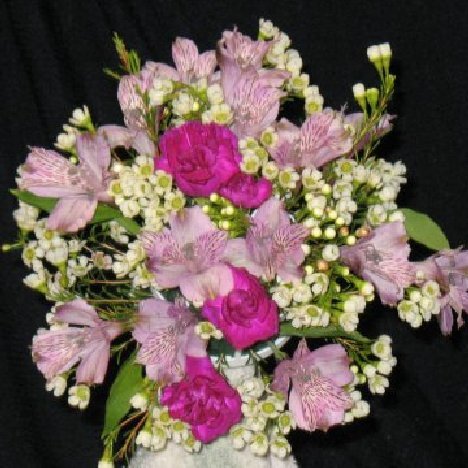
So far we've use one stem of wax flower, one stem of miniature carnations and three stems of alstromeria. You can see the bouquet is filling out nicely.
I absolutely love blue delphinium. This is one of the few flowers that actually is "true blue". In comes in a light, powdery blue and a darker, more dramatic deep blue.
One grower's bunch is considered to be 10 stems. There are different grades, with a premium (much larger, taller variety) versus the normal, slender stalk. This is the type you want to use in bridal bouquets and corsage work.
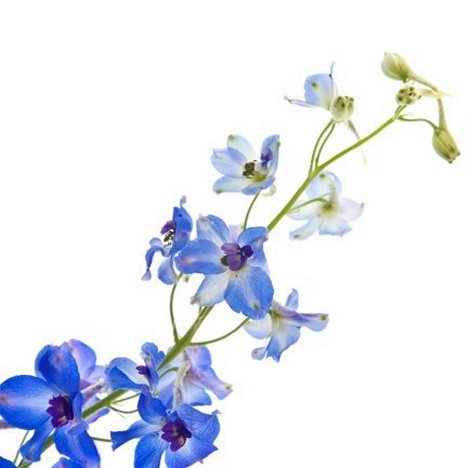
Cut the delphinium into pieces and insert randomly all around.
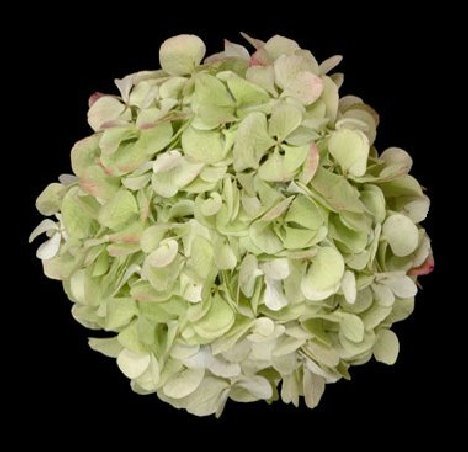
Hydrangeas look like a single flower head, but it has four or five laterals coming off one stem. Keep in mind that this is a very water loving plant and doesn't like hot summer days. If your wedding day is going to be a scorcher - you may want to substitute stock flower.
Keep hydrangeas well misted and hydrate the bouquet often during the wedding day when the bride is not holding it.
Fill in any more holes with wax flower until you have a tightly massed bouquet in a round shape!

I cut corsage pins down to a shorter length. Please take precautions to do this correctly, as the sharp tips could cause injuries. Always wear eye protection and insert the steel shank into a stiff block of styrofoam and hold the pearl ends firmly between two fingers before cutting.
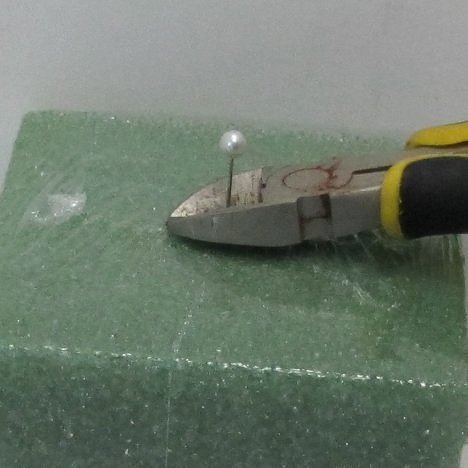
With the right length, simply push the pin into the center of the flower head, taking care to bury the tip within the bulb of the flower.
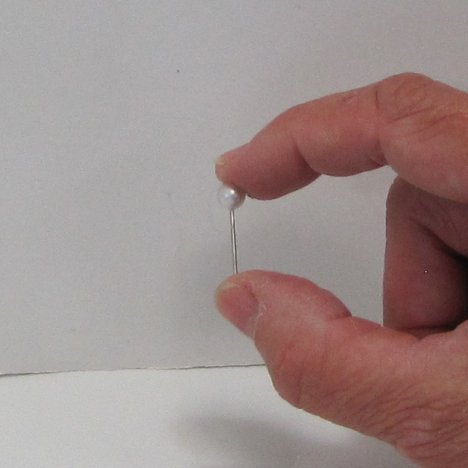
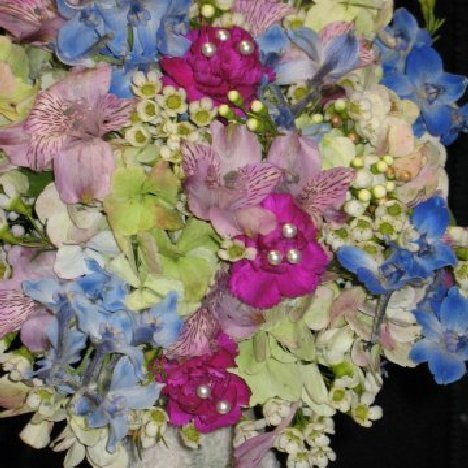
Pearl headed pins come in lots of different colors and make lovely accents to your flower heads.
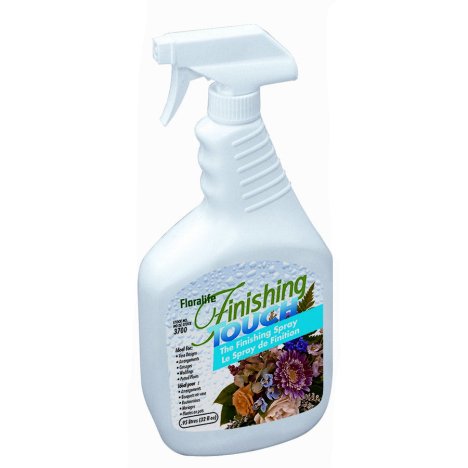
If you are making your own wedding flowers, always think "hydration, hydration, hydration". Keeping the florist foam wet (remember - these are live plants that are actively drinking" and that your home conditions are not built like a florist's cooler. I mist all flower designs with a flower sealant called Finishing Touch.
Air conditioning and home refrigerators are built to REMOVE humidity from the air. Florist's coolers are built to put humidity INTO the air. Since you don't have that advantage, you need to mist your flowers well with a flower sealant such as Finishing Touch.
It seals and hydrates thru the petals and slows down petal transparency. Mist well, and wait for it to dry before putting in a refrigerator.
If you cannot refrigerate all your flowers, keep them in a cool basement or air conditioned room away from light sources.
On the other hand, if you need a flower to open more, (such as lilies) you can cut, dip in a re-hydrator (such as Quick Dip) and place near a warm (not broiling hot!!) window or patio door.
The flowers usually respond quickly by opening up.
I also lock the flowers into the wet foam by using Floralock. This comes with a red straw that inserts into the can's nozzle. Shake the can thoroughly, then carefully insert the red nozzle in between the flower heads. Squirt in short bursts, and allowing the glue to dry.
Do this stem LAST, and be sure you have all the flowers you want in the bouquet, as it is hard to insert more flowers and the adhesive could clog up the flower stem making it hard for the flower to pull water up to the head.

Please be sure to check out different ways to finish the bouquet handle, You can wrap in wire, ribbon or even create a "mock hand tie", which uses the discarded flower stems, attaching them to the bouquet handle to mimic the look of a traditional hand tie. Read those tutorials to learn how to master this technique.