corsages and boutonnieres
Corsages and boutonnieres are created the same way. The difference is usually in the number of flower heads and/or the addition of a bow. Today's boutonnieres, however, include decorative elements that can easily be used as both a corsage and boutonniere!
Greenery adds so much to even the simple designs. I love experimenting with different textures of various leaf varieties. Greenery can add so many interesting textures and enhanced eye appeal.
For this tutorial you will need:
- 1 standard rose
- 7 Salal Leaves (Lemon Leaf)
- 3 pearl headed pins
- 1 roll floral tape
- Green floral wire (26 gauge)
- Wire Cutters
- Finishing Touch flower sealant or Crowning Glory
- Leafshine Greenery Polish

Be sure to ALWAYS process your bulk wedding flowers properly. This lets you examine your flowers before you design with them, get them rehydrated correctly and ensures that you've done everything to keep your flowers as fresh as possible for as long as possible!
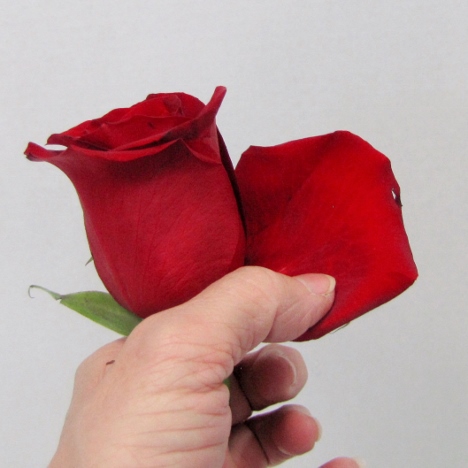
Roses are shipped with outer petals that look damaged still attached. These are left on deliberately during shipment to protect the inner rose petals.
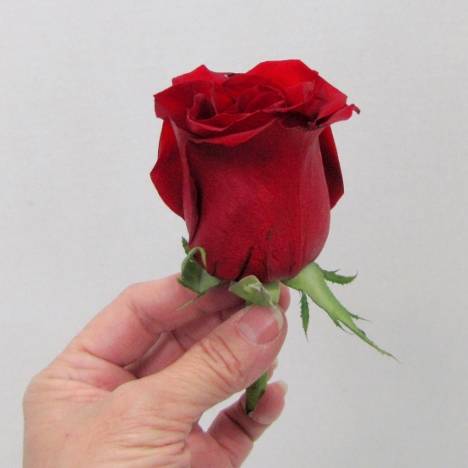
Florists remove these petals right before designing. Leaving them on insures that the flowers don't collect extra bumps or bruises during your own handling of the flowers.
It is a good idea to wash your hands and spray your fingers with Finishing Touch before handling the petals. This keeps the oils from your fingers from transferring to the rose and causing premature browning.
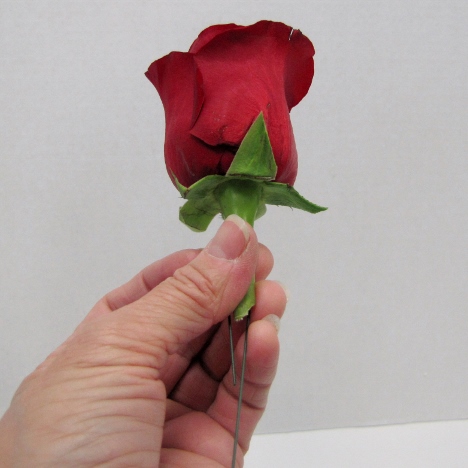
I cut boutonniere roses short and piece the bulb of the rose right below the flower head with a 26 gauge wire.
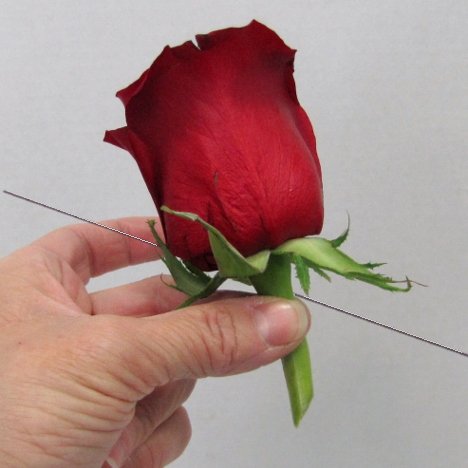
Bend the wires down parallel to the shortened stem.
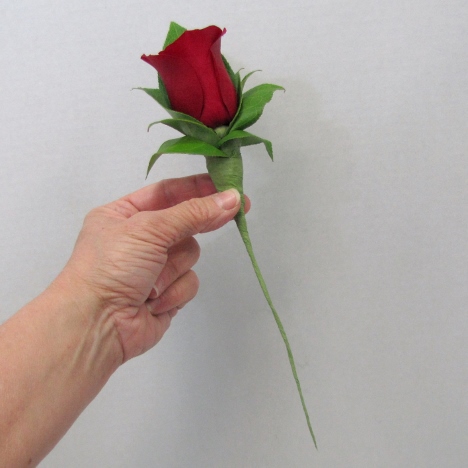
Tape from right under the petals all the way down the flower stem, pulling and stretching the tape as you go. This causes the tape to adhere to itself.
Wire stems are thinner than bulky flower stems and keep your design from looking fat and clumsy later as you add more elements to your design.
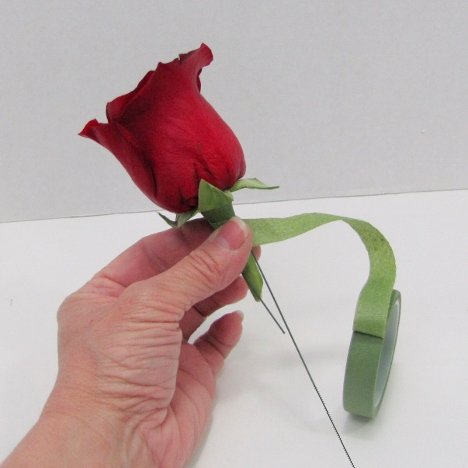
I plan on coiling this long wire up later and making it part of the final design. Do not clip it short at this point.
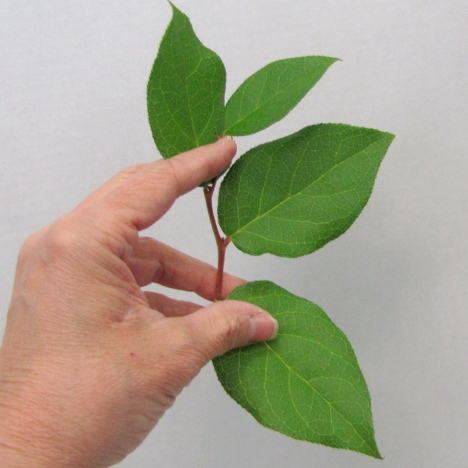
Sala comes in a generous grower's bunch.
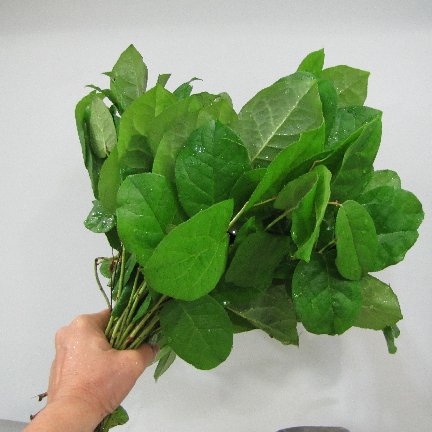
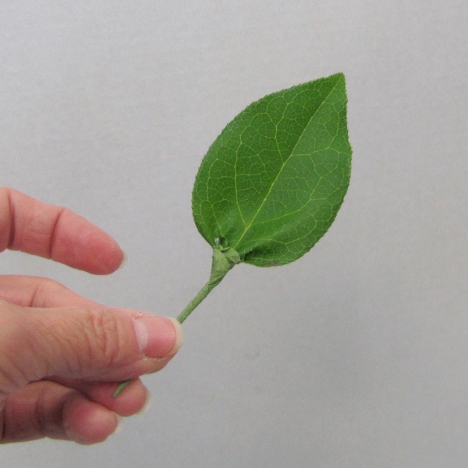
Salal leaves (sometimes commonly referred to as Lemon Leaf) is a beautiful green glossy leaf with a traditional rounded shape.
I usually spray my fresh greenery with a leaf polish. Leaf polish will seal the leaves against moisture loss and leave them looking glossy and shiny. Sometime water can leave greenery looking dull as splotchy because of the calcium build up in hard water.
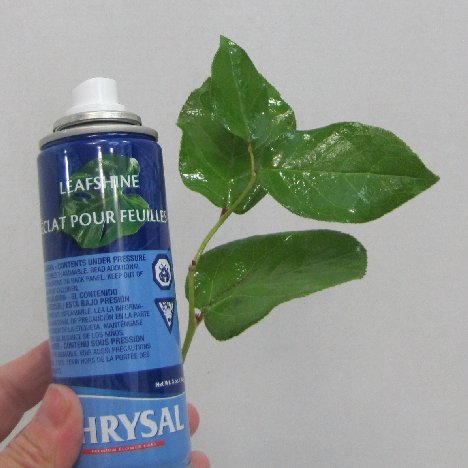
You can spray before working with the leaves or later, after you have them all wired and taped.
I pierce the bottom of the lemon leaf with a green florist wire.
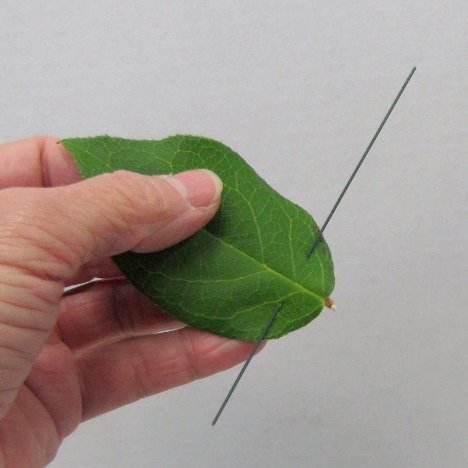
Press your thumb and forefinger firmly on both sides of the wire where you have pierced it and bend the wire down parallel to the stem, taking care not to tear the leaf.
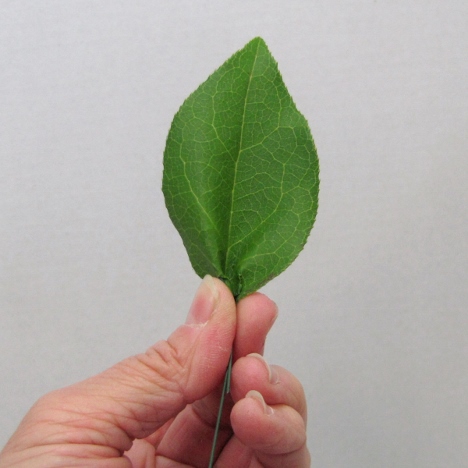
I pinch the bottom of the leaf together and then tape the base of the leaf, continuing on down the wire stem.
The leaf will have a little pucker at the bottom after you are done wiring.
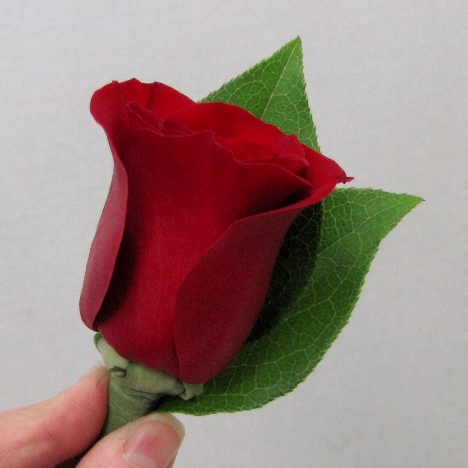
Apply your taped salal leaf directly behind the head of the rose. The tip should show over the flower head as shown.
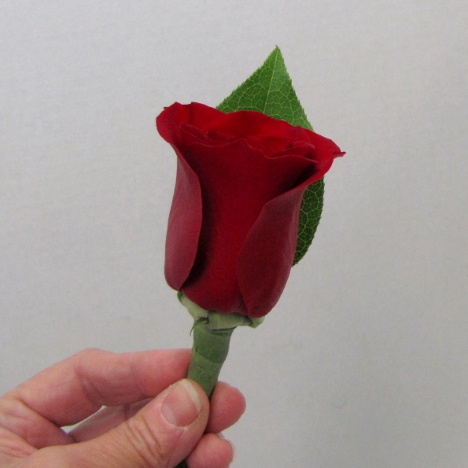
Wiring the leaf allows you more control. You can actually bend it forward a bit so it cups firmly around the rose head.
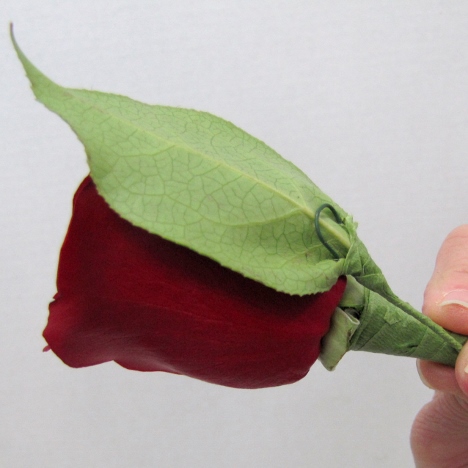
Now I'm placing a second wired leaf behind the first, slightly lower and to the right of the rose. Tape into place.