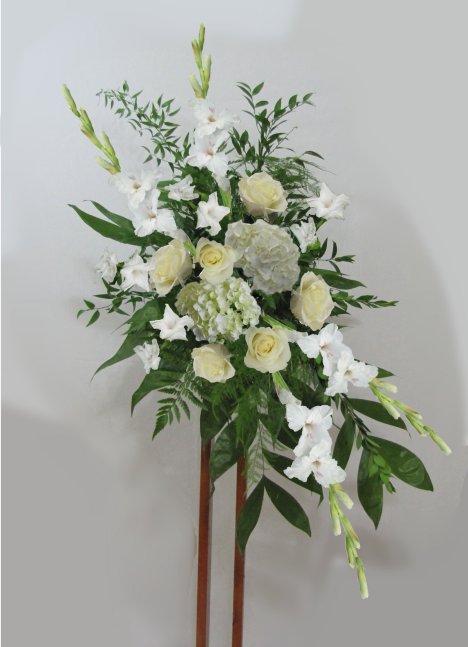
Church flower stand
A church flower stand can be adapted to hold many different kinds of flower designs. Free standing stands can usually be rented from wedding companies. Florists learn how to adapt stands to create different looks.
This tutorial shows how to create the basic mechanics setup and filling in with a variety of greenery. Don't think your own arrangement has to be exactly as shown below. Add colors or different flower varieties to make the look exclusively yours!
You'll need:
- Rental stand or candelabra
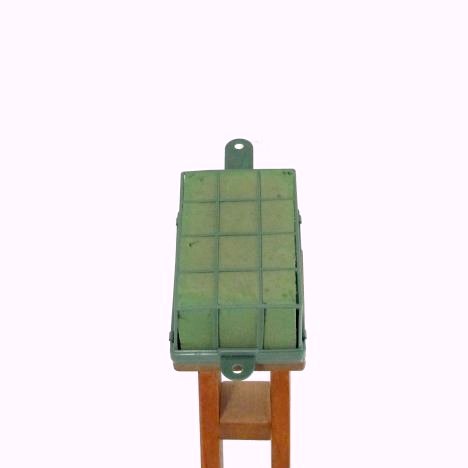
- Oasis Floral Cage
- 22 gauge florist wire
- Cut Flower Food
- Leaf Shine
- Floralock (optional)
- approx 8 stems Jade
- approx 8 stems leather leaf fern
- 4 stems Italian Ruscus
- 4 stems myrtle
- 4 stems plumosa
- 4 stems ming fern
- 6 stems Gladiolus
- 2 stems Hydrangeas
- 6 stems Standard Roses
Feel free to add or delete greens or flower varieties or colors, substituting others for your own distinctive look!
Keep in mind that whether you are greening a cage for a floral stand or for a candelabra - the basic principals are the same. You have to choose the right cage, soak it and then securely attach it to the stand.
I had simple wooden stands custom made for me. So many brides are shying away from the brassware and the warmth of the wood fits beautifully in both a casual or formal setting.
Check wedding rental companies in your area to see what church equipment is available.
I generally begin by using a few strips of floral clay on the flat surface. This bonds tightly to the smooth side of the cage and is added security to keeping it in place. This is not an absolute necessity - but if you have the clay available it's a good idea.

Secure attachment is vital because you'll be transporting a designed floral. Preventing slippage or shifting of the design is crucial to quick setup before the ceremony.
Note that Oasis cages have handles and tabs with holes.. These to give a handy place to thread wire for attachment to stands, candelabras and easels.
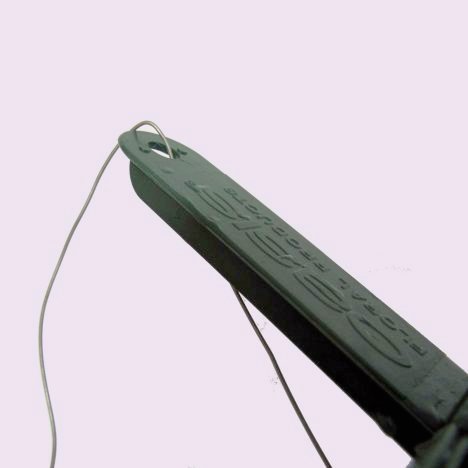
Thread a 22 or 26 gauge wire through the eye of the tab.
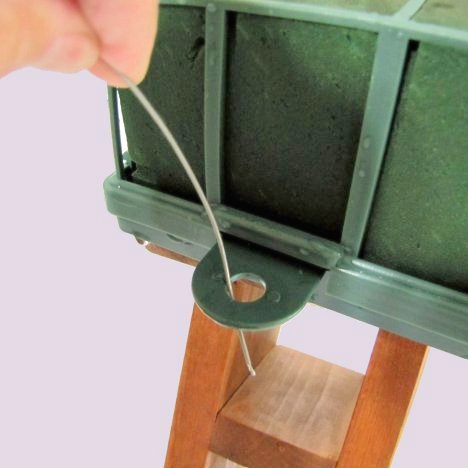
Twist tightly to create a strong attachment to your own rental stand.
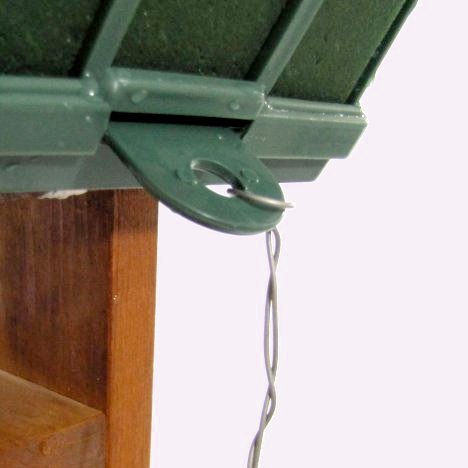
Slip the wire under or around the stand and thread through the hole in the handle on the other end of the cage.
Give the wire a few twists down, making sure you have a tight bond from end to end.
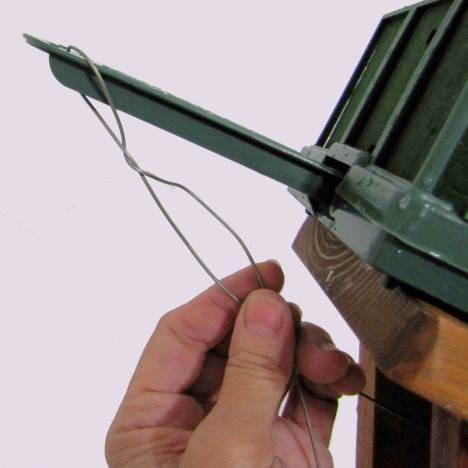
When you need to break down the arrangements after the wedding is over, all it will take is a quick snip of wire cutters to remove the arrangement from the stand.
Tug lightly on the cage to be sure that it is firmly attached to the candelabra. Wet foam and lots of greenery and flowers are HEAVY. Take care that the mechanics (foam cages) are securely attached and (eventually) hidden by the flowers or greenery.
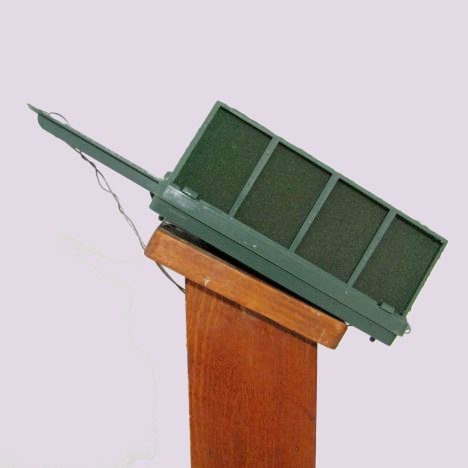
Greening in your wedding or candelabra stand properly will give a framework that will determine the eventual height and width of your floral display.
You can do mass arrangements of nothing but flowers, but keep in mind that would add significantly to your cost, since blooms are more expensive than greens.
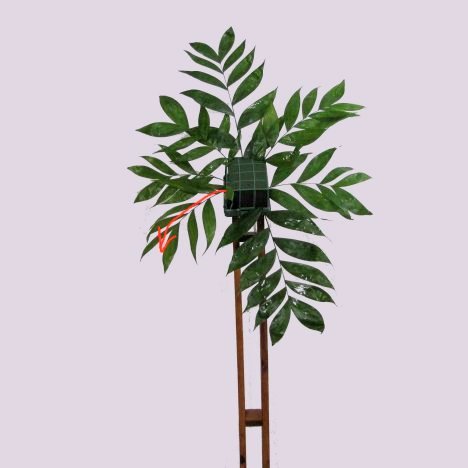
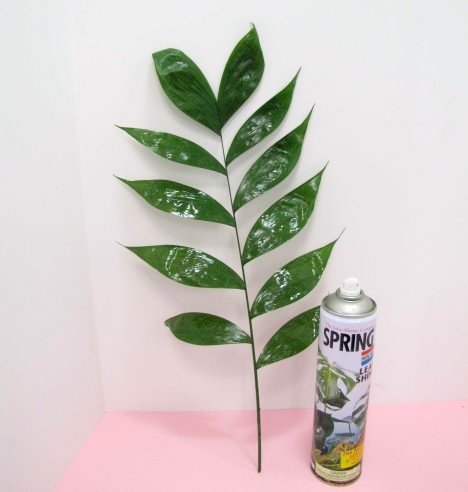
Use large leaf greenery for big sprays. Below is jade, a big inexpensive fern with broad leaves and a pleasing shape.
Understand that fresh products cut in the field are not always "picture perfect". Expect a small amount of wastage with every bundle and allow for that when ordering your greenery. Jade is packed in bundles by weight, so the number of stems vary. I generally find that there are between 18 - 20 stems in a bunch of jade.
I use a product referred to as "leaf shine" by professional florists. Greenery that has been rinsed at the farm sometimes show a white powdery residue or spotting. Leaf shine will clean up the foliage and seal it, keeping in the moisture and giving it a clean look.
Do not spray leaf shine on flowers (the propellant is extremely cold and could freeze flowers) instead use a sealant made especially for flowers, such as Finishing Touch or Crowning Glory.
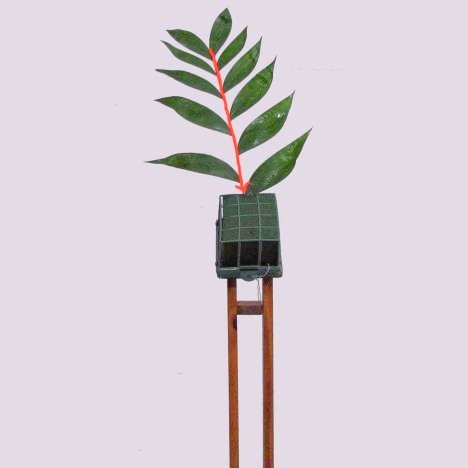
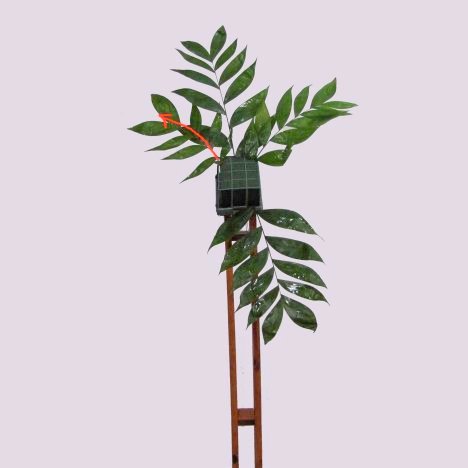
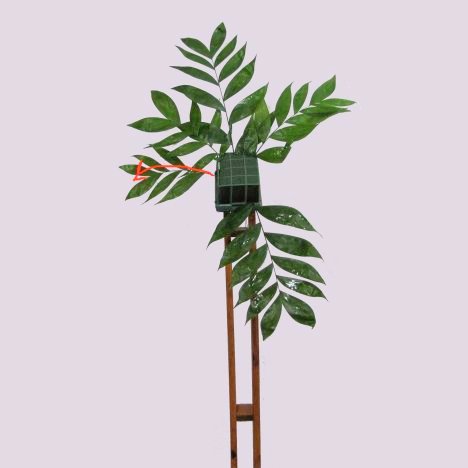
Wait until the greening is done to spray the leafshine. Insert your first piece of jade from to the, tilting it slightly at a backward angle.
If you are doing two arrangements, be sure to do "mirror" images - switching the angles from right to left depending on which arrangement you are working on.
Now insert a second piece from the bottom of the cage, at a slightly right angle.
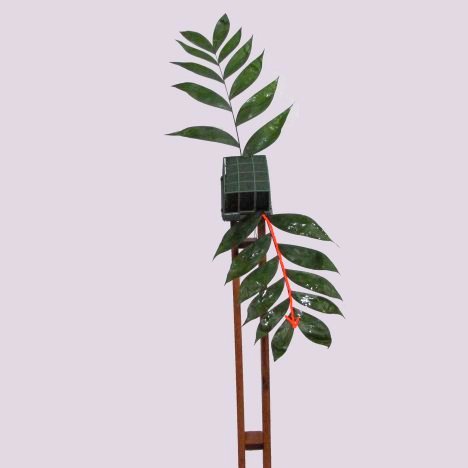
Note how you use the natural curve of the jade to emphasize that the greenery starts from the middle and springs out to the sides in a natural manner - much like a growing fern.
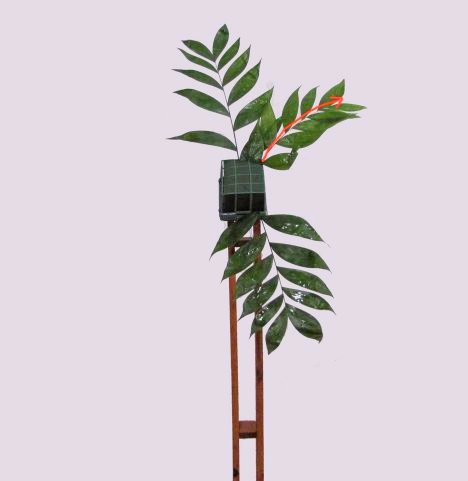
Continue to add your greenery. Don't try to be picture perfect with the lengths of your greens . The idea is to end up with a natural arrangement that mimics a live plant.
Church florals are usually viewed from three sides. Therefore keep an eye on your arrangement that the floral looks pleasing from the right and left sides as well as from the front.
Greening become quicker as you get used to filling in your arrangements. A good designer can fill in a large arrangement quickly. I generally green in a day or two in advance and transport that to the church, and finishing flowering at the church.
Greens are usually easy to transport - but flower heads can be bruised or snap off in transport. If you have plenty of room in your transport vehicle, then you can finish the arrangement. If you have to crowd several arrangements together, consider finishing the flowering part of your arrangement at the venue.
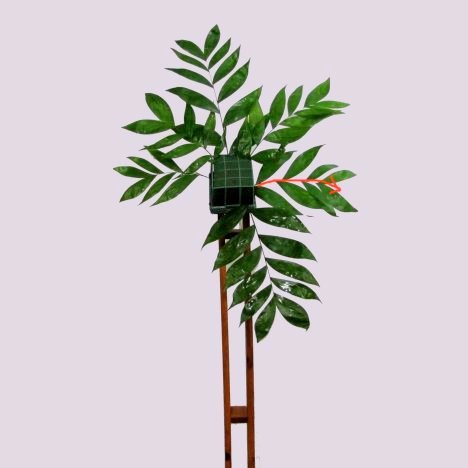
See how seven pieces of Jade suddenly give you a size and shape of your eventual finished design. Go big for a large church. Florals that seem large on a kitchen table diminish a lot when in the front of a large stage or church sanctuary.