wedding ceremony decoration ideas
Wedding ceremony decoration ideas usually involve large flower displays.
This altar flower tutorial will guide you through the basic steps of creating your own beautiful flower design. Consider the flower varieties a suggestion . . . not an absolute.
Changing colors and flower varieties give you many possibilities for completely different looks. It is the designing process that remains the same - choosing a container, blocking in the foam, basic greening and then (finally!) adding in the flowers of your choice.
Remember also that the number of stems needed and the length which you cut them is basically up to you. Cutting stems longer will create a bigger design . . . shorter ends up with a smaller floral.
So the following product list can be changed an adapted to suit your own needs and color scheme. Please feel free to eliminate some of the greenery or flowers or substitute others more to your liking.
Products needed:
- Large Urn container
- 1 Oasis Brick
- Flower Food
- Bunch Cutters
- 1 Roll Waterproof Tape
- 2/3 bunch of Myrtle
- 1 bunch Leather Leaf Fern
- 1 -2 stems Ming Fern
- 2 -3 stems Italian Ruscus
- 4 stems Gladiolus
- 2 stems Alstroemeria
- 4 stems China Asters
- 1 - 2 stems Daisy Chrysanthemums
- 7 Standard Roses
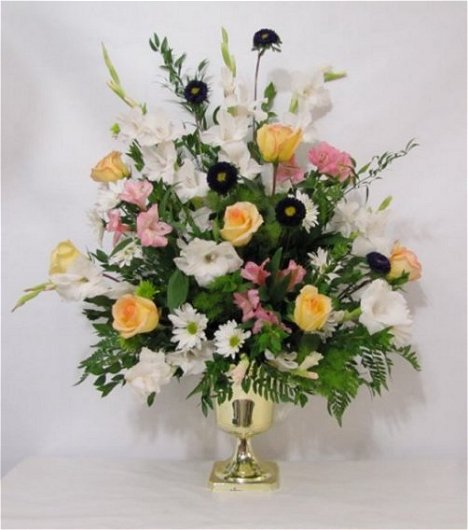
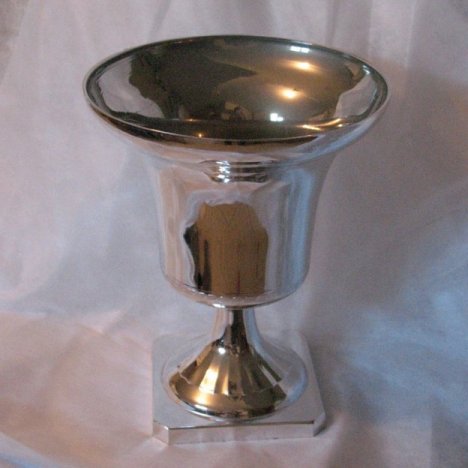
A flower urn is typically a large container that is set upon a pedestal. It's not necessarily the size of the container, rather the shape that defines it as an urn.
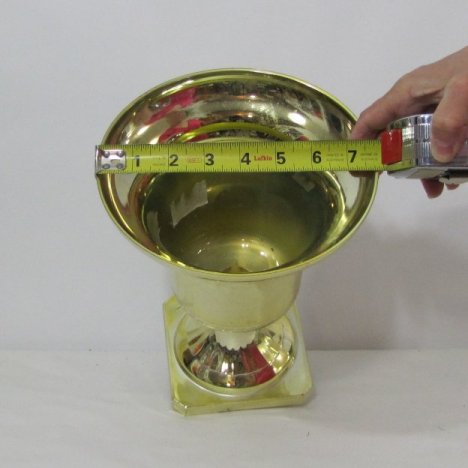
For this wedding tutorial, I'll be using an urn that is approximately 9 1/2 inches tall with a wide bell shaped opening at the top.
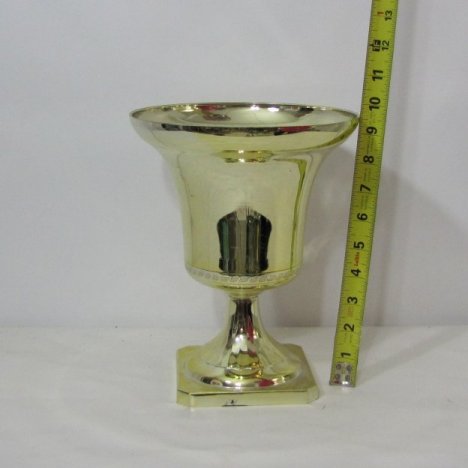
This florist container has a generous 8 inch opening and is able to accommodate a large block of floral foam for both fresh and silk designs.
The attractive metallic finish gives the rich look of brass or silver, but is really made of high impact, lightweight plastic that comes apart in pieces.
This makes it an inexpensive container that is easy to ship - yet gives the impression of a heavier, costly container that is very showy for large florals.
The size is perfect for one standard brick of Oasis florist foam.
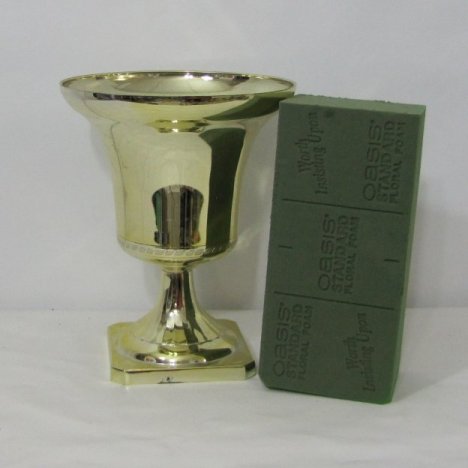
There are many different styles and designs of these containers. They are waterproof, will not corrode or need to be polished . . . and are cheap enough to use as a "throw away" container after the event is over!
These urns are available in silver and gold finishes, as well as black and white.
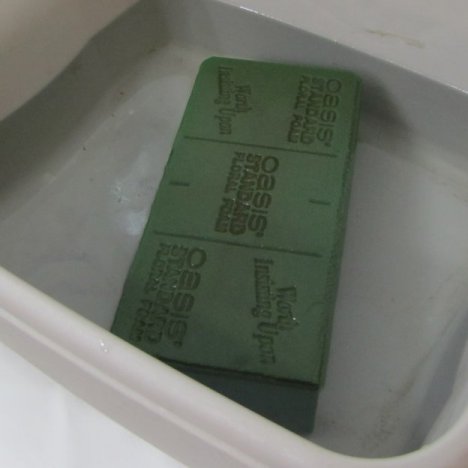
Soaking florist foam completely in water that has been treated with a quality flower food is the first important step for this tutorial.
Choosing to do your own floral designs means you need to treat your flowers as a professional would. A professional knows that the key to keeping your flowers fresh throughout the entire design process means using the right products.
There are all kinds of "home remedies" floating around on the internet. Everything from sugar water to soda to putting pennies in water. In essence, too much treatment can be just as detrimental to the flowers as no treatment.
By using a professional mixture, you can measure and add the proper amount needed to feed and nourish those expensive bulk wedding flowers. The cost is nominal when compared with the actual cost of the flowers!
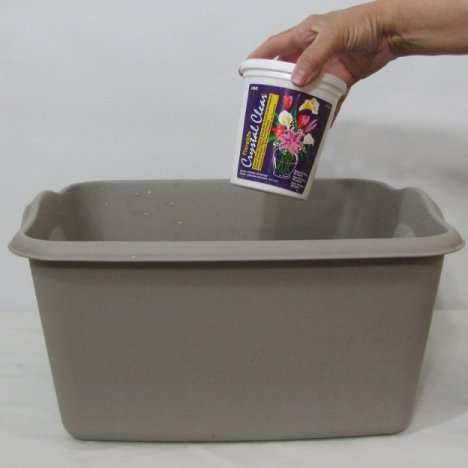
A single brick of Oasis Maxlife foam holds an incredible amount of water (up to 2 quarts!) Fresh flowers need to uptake a large amount of clean water each day.
Be sure that your foam always stays saturated - adding more water if needed each day that passes.
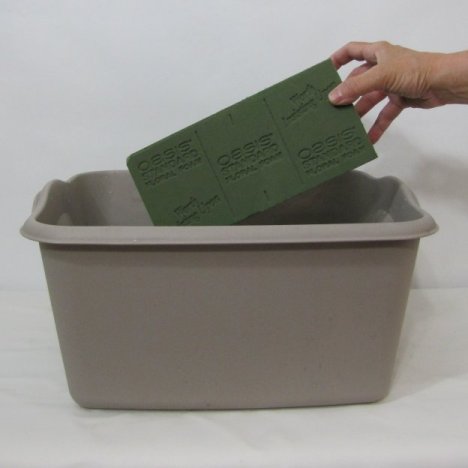
Another important point is to let the brick of foam "float soak". Do not push the brick below the water surface, trying to force it to soak up water more quickly.
Oasis bricks saturate quickly anyway . . . but it's important to allow it to sink to the bottom of the water container by itself. This way you know there are no dry spots trapped inside the brick that can be death to a flower stem.

You can see the brick turns dark as it absorbs the water. Maxlife comes in different densities for different types of flowers. (Such as spring bulb flowers, which need a lighter density not to crush the stems as they are pushed into the foam.)
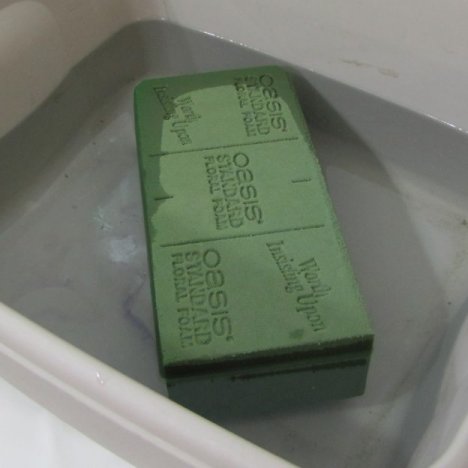
The brick is marked with score lines so you can easily cut it into even portions of half or thirds if needed.