hand tied bridal bouquets
Ever wish you could make hand tied bridal bouquets like a professional florist? Well . . . keep reading. Here is a step by step tutorial that will soon have you designing like a pro!
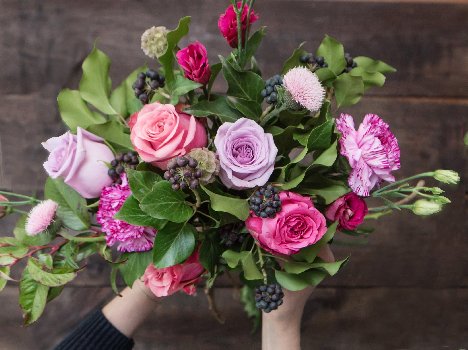
These large bouquets are the latest in modern wedding bouquets. Overflowing with big lush blooms and mixed foliages, they are a delight to carry and will look wonderful in your wedding photos.
After processing your flowers correctly, you can begin designing after your flowers have had an hour or two to re-hydrate. Begin by counting and separating all the flowers and greens you plan to use for each individual design. Set aside enough stems for each attendant's bouquet. That way they may not look identical, but they'll be about the same size if you use the same flowers. Set aside all flowers you'll be using for boutonnieres and corsages. That way you won't run short by using too many in the bouquets.
You can substitute colors (or even flower and greenery varieties). Here are suggestions to create a similar bouquet:
- 2 lavender tea roses
- 3 dark pink roses
- 4 scabiosis pods
- 8 stems privett berries
- 2 standard carnations
- 2 stems bachelor button
- 3 stems lisianthus
- 4-5 stems salal tips
- 3-4 stems israeli ruscus
- waterproof floral tape or waxed string
- crystal clear flower food
- Finishing Touch or Crowning Glory flower sealant spray
It's a good idea to line up vases filled partway with water (treated with professional floral food) and separate your flowers and greens by variety. That way you can easily select the next flower for your design without having to lay your partial designed bouquet down on the table.
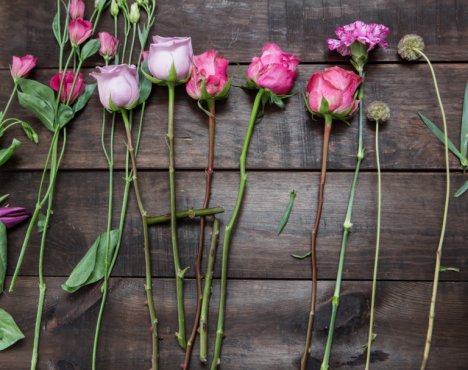
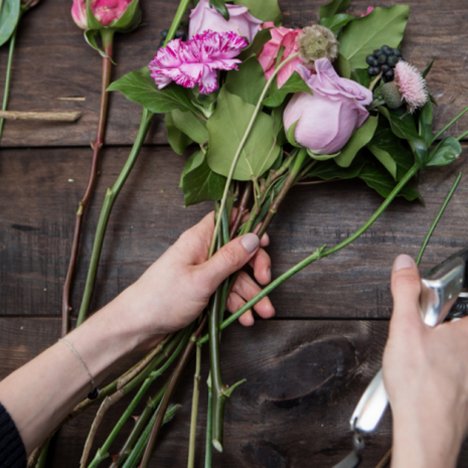
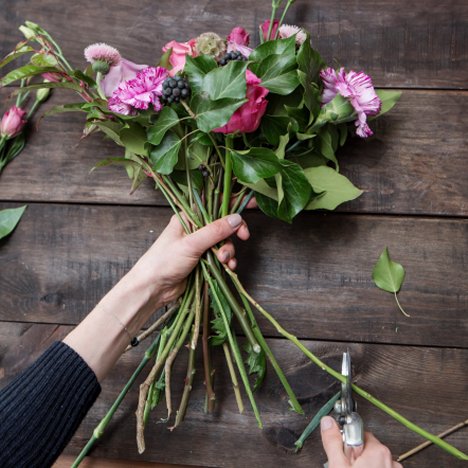
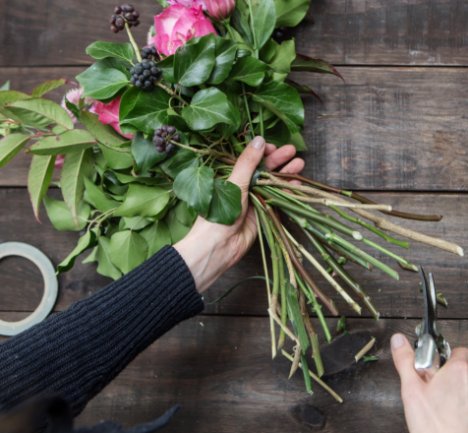
Start by cutting off all low laterals (branches very far down the stems that would be crushed in the center of the finished bouquet) and putting them aside for use in corsages and boutonnieres later.
Clean off your stems of all thorns, leaves and anything else below the flower heads. Smooth, cleaned stems work best - not only for saving painful jabs to your fingers, but also to keep from snagging bridal dresses and veils.

Create the center of your bouquet by gathering a few flower heads together and holding them in one hand.
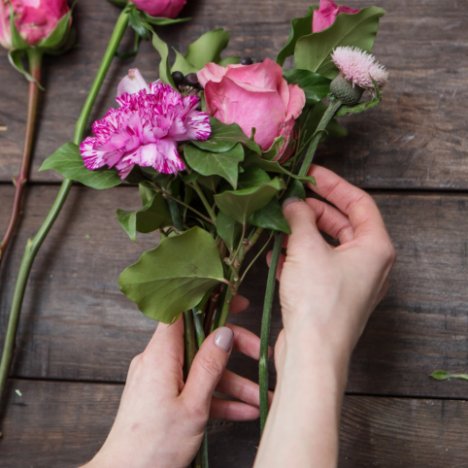
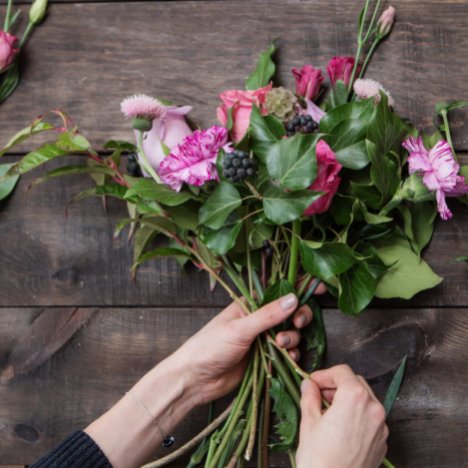
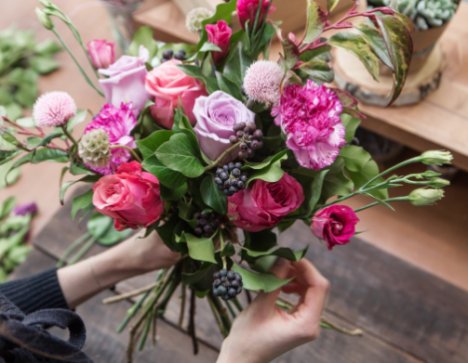
Mix it up, choosing different varieties to create interest and lots of textures in your bouquet.
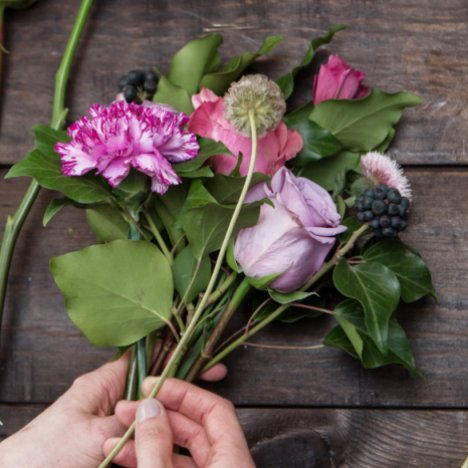
Turn the bouquet heads so they face outwards on all sides of your design. The modern hand tied bridal bouquets are usually a casual design and more forgiving than the tighter packed bouquets are.
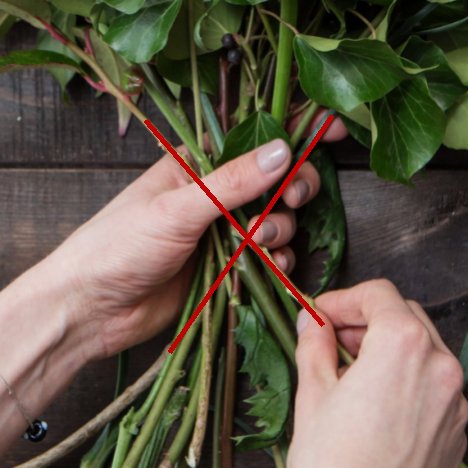
As you begin adding in more and more flowers and greens, begin to cross the stems at about a 45 degree angle, then rotate the bouquet in your hand a one quarter turn before adding in another flower stem.
Crossing the stems will cause the lower portion of the stems to flare outwards. The head of the bouquets will also separate, creating a circular pattern in the bouquet. Failure to rotate the stems means the flowers will begin to bend outward, creating a real possible of crushing or the snapping and breaking off of delicate stems.
If you have spiraled the hand tied bridal bouquets correctly, they should be able to stand up on a tabletop when finished without any support.
Add in stems of different kinds of greens, so that your design fills in nicely with an even mix of greens and flower heads.
If you want the wild and willowy look, don't try to keep all your flower heads even. If you want an oval bouquet, begin adding longer stems off both the right and left sides.
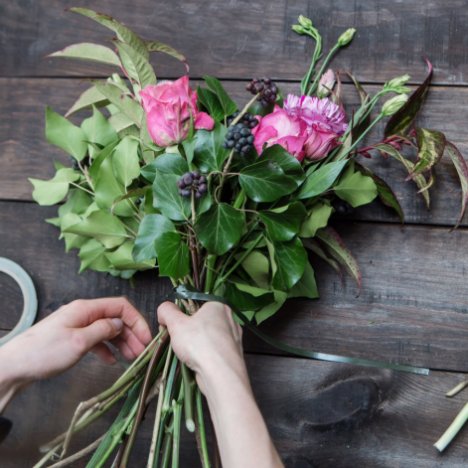
If the long stems at the bottom make the hand tied bridal bouquets hard to handle, simply cut off some of the excess. Leave them longer while designing, however, so you can adjust the flower heads up and down if necessary.
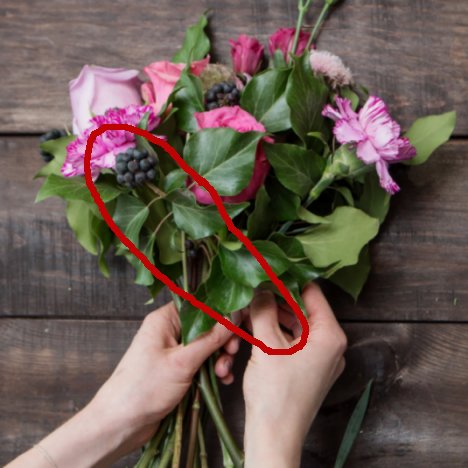
Before taping, look down on your bouquet and adjust any stems that need to move up or down. I like to have a full length mirror close buy to check out how the hand tied bouquet bouquets look when being held against the body. Big bouquets are wonderful - but they can overpower a small statured bride. Be sure to scale the size of the bouquet to the one who will be carrying it down the aisle.
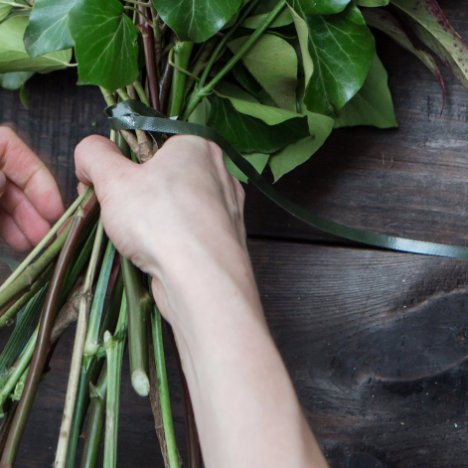
Once you are happy with the size of your hand tied bridal bouquets, you can add more greenery on all sides if you wish. Bind the crossed stems with either waterproof tape or waxed string, as neither will crush delicate flower stems that need to continue to draw up water to keep fresh until the wedding day.
If the hand tied bridal bouquets are too large to tape one handed, you can enlist the help of a friend to wrap the tape around the stems while you hold the bouquet, keeping the stems in place. Wind tape tightly several times. You don't want the stems to be loose or come apart!
If you are happy with the finished bouquet, now you want to trim the bouquet off until the bottom stems are a manageable length. For extra large bouquets, allow at least two hand widths down if the bride needs to hold her bouquet with both hands.
Cover up your hand tied bridal bouquets by wrapping over the tape with either colored wire or several loops of ribbon. This gives you a finished look because no design elements should show in your finished project.

Hand tied bridal bouquets are great favorites with today's modern bride. The technique used by professional florists is usually to hold the flowers in one hand while adding stems with the other hand. To achieve a round, flared bouquet, it's important to rotate the bouquet as you add each flower stem.
This may prove awkward to inexperienced brides, but with a little practice you'll soon be making the bouquets without difficulty. If your hands are small, you may want to consider one of the alternative methods to achieve the same look.
This means either designing a "mock hand tied" or creating your bouquet in a flared vase.
I like the mock hand tie, because it gives the flowers a much needed water source. Many favorite flowers either come from a shrub plant (such as hydrangeas and viburnum) or have soft stems (such as tulips, Gerbera daisies). None of these varieties survive very long without a constant water source. This does include the newest favorite - garden roses.
You can still have the favored "hand tie" look - yet really be designing them on a bouquet holder made with Oasis Maxlife foam by concealing the bouquet handle with the cut stems of your flowers and greenery. Don't worry - your guests won't even realize that you made that lovely design on a bouquet holder! The extra advantage is that you can place those flower heads exactly where you want them instead of awkwardly trying to get them to stay in place in a traditionally designed hand tie.
Another hand tied method I also have a tutorial for is inserting each flower into a flared vase, then lifting out the finished bouquet with both hands and having a friend tied it off for you while you hold the flowers in place. This works well for the "assembly line" method . . . simply meaning you move down a table in insert each flower in the exact same place - ensuring that all your attendant bouquets look the same.
I show many tutorials using both hand tied methods as well as the mock hand ties - so feel free to practice so that on your wedding day you'll make the hand tied bridal bouquets of your dreams - and save money, too!
