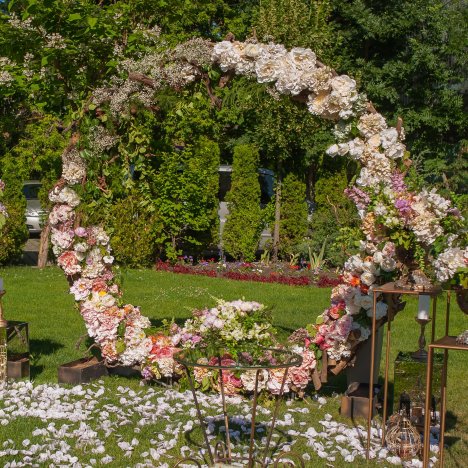
Circle wedding arch
A circle wedding arch takes some time and preparation, but is much easier if you create it with artificial flowers rather than fresh. This gives you the additional time needed to create such a large project.
I've broken this down step by step, so you can see how I figure out the amount of flowers needed as well as the floral supplies.
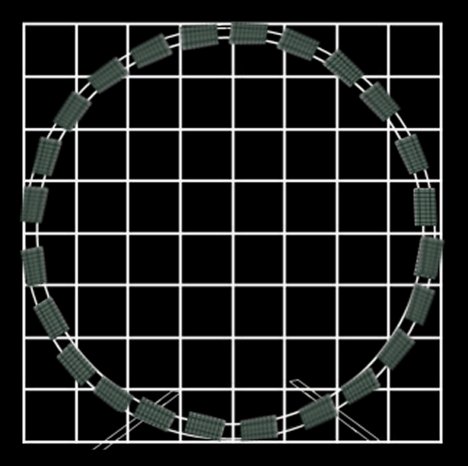
You have to start by figuring out the circumference of the arch you will be needing. To make it simpler, I will show you on a graph how I calculate my flowers. This can be adapted for your own needs, even if you change the colors to suit your own wedding.
A typical standing circle arch is 8 foot wide, such as the one shown below.
Each square on the grid is equal to one foot. So an 8 foot diameter circle fits against the grid as shown below. Using a standard brick of either fresh or dried florist foam, I placed it to scale against the arch I'm using. Since each brick (for fresh or silk) has the measurements of approximately 3" x 4" x 9", you can see below how many bricks you need.
This 8' arch will need about 24 bricks, but you can use less if you want them spaced out more. To do that, you'll need to have longer stems on the flowers and they'll be spaced farther apart. This spacing will give the tight, massed look of this arch design.
Keep in mind that florist foam is rather fragile. A large amount of stem insertions can degrade the foam. Foam encased in cages gives strength to the foam. These cages come ready to use. , while others are ready to have a foam brick inserted into it. This foam is intended for fresh flowers (because it can be soaked in water and used by fresh flowers. You can certainly use it for silk flowers as well. Simple skip the soaking process and dip the stems of the artificial flowers in white craft glue before inserting them into the foam.
This is not the most cost effective, however, and can run you over $200 simply for enough cages needed to encircle the bricks. If time is of the essence, this is the best way to go.
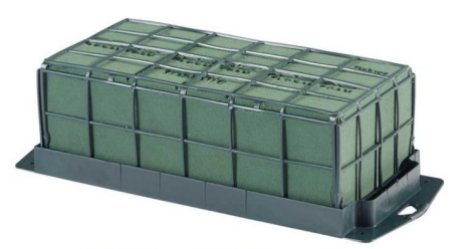
A more cost effective way is to create your own grid on the foam to ensure it's integrity. (If you want to use the designs over and over again, such as intent to use as rental arrangements, I suggest you do invest in the plastic cages, as this will hold up better.)
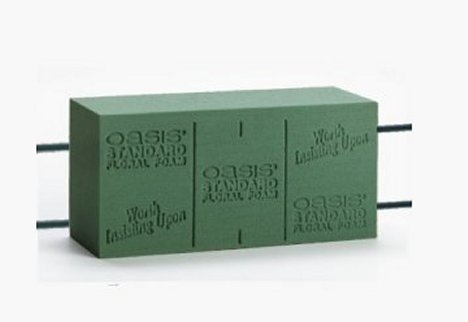
So this is what you need to do for quick assembly and quick removal. Start with a fresh Max-Life brick for fresh flowers or an Sahara (dry) Brick for artificial flowers. You will need two wooden Cowee stakes.
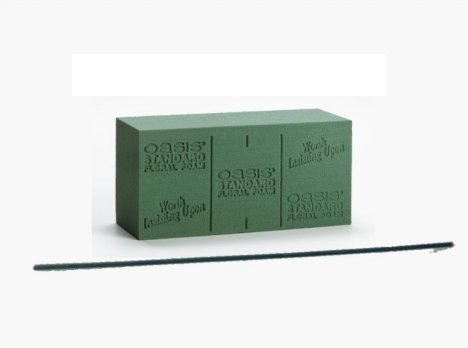
Carefully insert the two Cowee stakes from the side, piercing completely through the entire length of the brick as shown below. These stakes are made of porous wood, which will swell and create a tight bond to the foam when soaked.
You will need Oasis Waterproof tape to create your own grid on this brick of foam. If using wet foam, you must do this procedure AFTER the brick is soaked, otherwise the tape won't adhere to the surface.
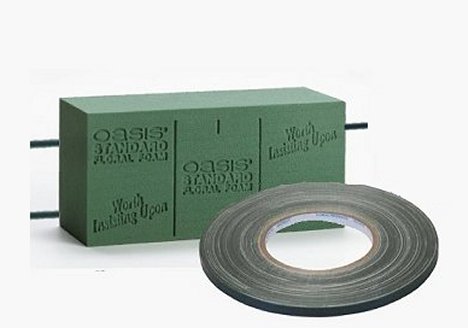
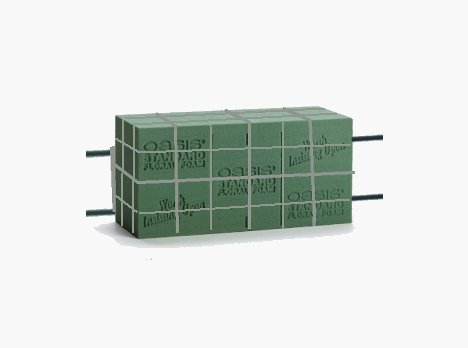
Use a generous amount of the tape to wind around the brick to create it's own "cage". This is where you need to decide whether to use a foam cage (approximately $9.00 - $11.00 per cage) or create your own with Oasis Waterproof tape (approximately $7.00 per roll). You will be able to wrap several bricks with each roll of tape. Just don't assume one roll of tape will be enough to create taped cages for 20+ bricks of Oasis foam.
Wrap the tape around the stakes as well, to keep them from flexing or moving in the brick.
So why do I put two stakes in the foam brick? You'll find out they come in handy when it's time to attach them to the arch.
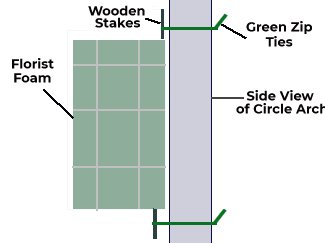
The photo below shows a side view of the arch. When the brick of foam is laid against the arch for attachment, the stakes will extend beyond by about an inch. This is what you'll wrap a long zip tie around the circle arch, over the wooden stake and again to the back to pull the zip tie tight.
It's quick way to attach the brick without mussing the flowers. When it's time to disassemble, a fast nip with wire cutters and it comes away quickly from the arch. This way you can create each brick separately, making delivery of the individual bricks much easier. Buying bricks by the case is usually 12 bricks at a time, giving the best price.
So how do you calculate how many flowers you need? This is a sticky point, as each designer make change the way they insert the flowers. I alway make up a estimation of what flowers I will use, breaking it down by size. I then create my "recipe". Why is this important? For one thing, you'll need to know how many flowers to order. For this, I have used my estimate (calculating flowers) sheet for years. Follow the link, as I explain it in detail.
So how do you create this look? Let me give you an estimate of the number of flowers used to create this design:
- 24 Brick Sahara (silk) Foam Bricks or 24 Oasis (Fresh) Foam Bricks
- White Craft Glue (Silk) or 2 cans Floralock Stem Adhesive (Fresh)
- 48 Wooden Stakes
- 50 extra long zip ties
- 14 stems of X-Large Flowers (8" - 9" heads)
- 5 Large Line Flowers
- 28 stems of Large Flowers (6" - 7" heads)
- 32 stems of Medium Flowers (4" - 5" heads)
- 75 stems Small Flowers (3" - 4" heads)
- 30 stems of Filler Flowers
- 50 stems of Greenery
If you look closely at the photo, you'll see the upper left corner is filled in with Baby's Breath (filler) and greenery.
I did create a silk flower page, so you can find the head sizes you need in silk. These flower heads are available in different colors, so you can easily adapt the color scheme to your own wedding palette.
