church pew bows
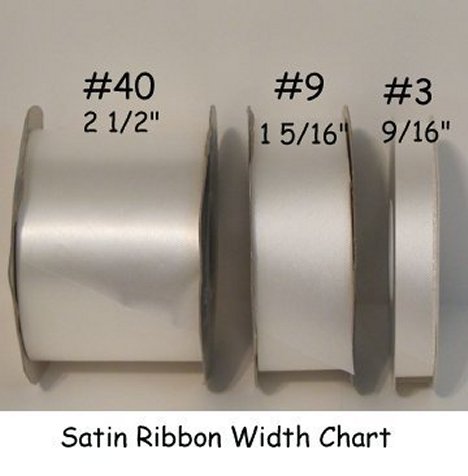
Church pew bows are usually made out of single faced satin. This inexpensive ribbon comes in a large varieties of colors and has a stiff, crisp feel to it. Do not mistake it for double faced satin, which is very soft and is used for things like hair ribbons, flower girl sashes and other clothing accents.
Flower shops usually make their pew bows out of #40 ribbon (which is usually between 2 1/2" to 3" wide) or #9 (which usually measure roughly 1 1/2" wide). The smaller width (#3) ribbon is more appropriate for using in wrist corsage bows. If you want a sheer ribbon, I suggest that you use a wired ribbon to help keep the shape of your bow loops without drooping.
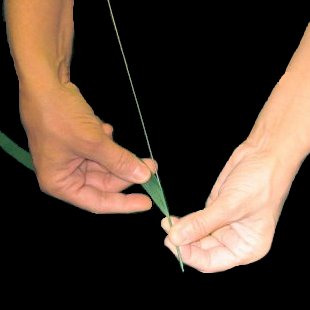
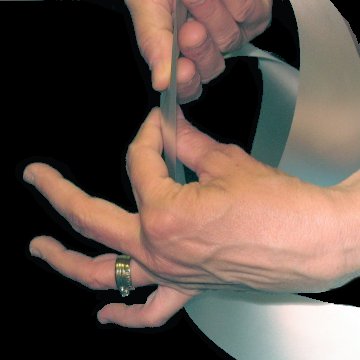
Start by taping a 22 gauge wire with florist tape. You can use white stem tape if you prefer with your white ribbon. If you twist your bows tight enough, the tape doesn't usually show anyway. Florist tape bonds to itself when stretched. Hold on to the tape at the top of the wire. Roll the wire between your fingers. Pull down on the tape, stretching it downwards as you roll the wire. Tear off the tape when you are at the bottom of the wire.
Keep this wire handy - you will need to be able to reach it when your bow is ready to be wired.
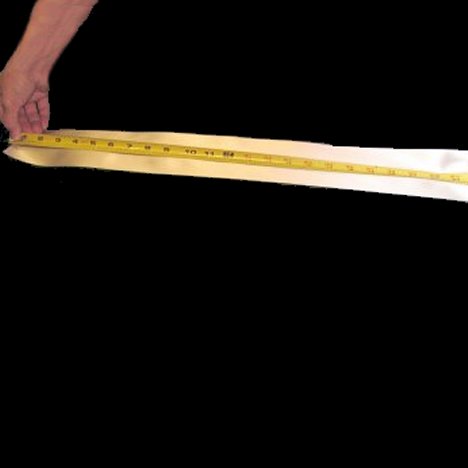
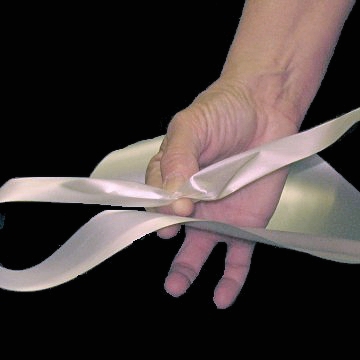
Measure a length of two foot (or more if you want longer tails) and grasp the ribbon with your fingers on the two foot spot.
(Hint: instead of measuring, I take a hold of the end of the ribbon and stretch my arm out. I then grasp the point on the ribbon where it meets my shoulder. If you measure this way each time, your pew bow tails will be approximately the same length without having to measure.)
Pinch the ribbon at this point between the fingers of both hands. Twist the ribbon tightly. Hold the twist firmly between the index finger and thumb of one hand.
While holding this twist firmly, pull more ribbon off the bolt.
Make a loop just big enough that you could slide your hand into it. Pinch the ribbon under the top twist between your index and middle fingers.
STEP 5
Twist the ribbon again. You should now have a top twist and a bottom twist.
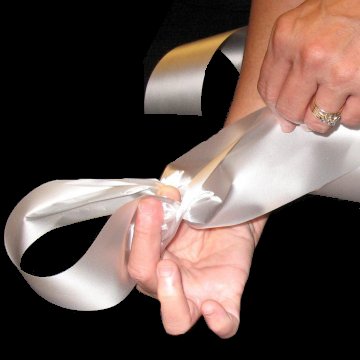
Place the two twists together.
Now hold BOTH twists firmly between the thumb and index finger of one hand.
Pulling more ribbon off the bolt, make a second loop on the other side to match the first loop.
Now you should have a loop on each side and the twisted points pinched firmly between the thumb and index finger of one hand.
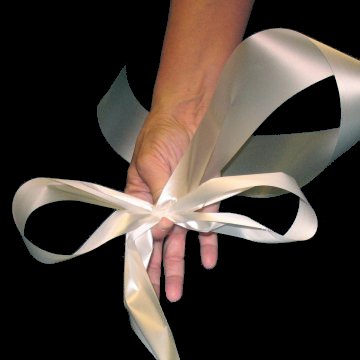
Continue pulling more ribbon off bolt and adding loops as before.
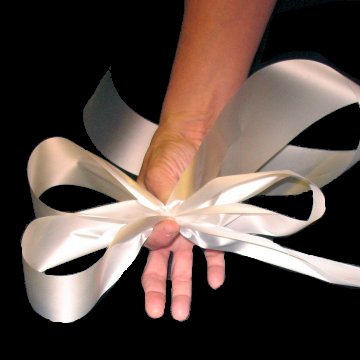
Continue adding loops and twisting each one until you have at least five loops on each side.It will begin to feel kind of awkward to hold this many pinches between your thumb and index finger.
Add more loops if you want a fuller church pew bow - but it will get harder to hold after five loops.
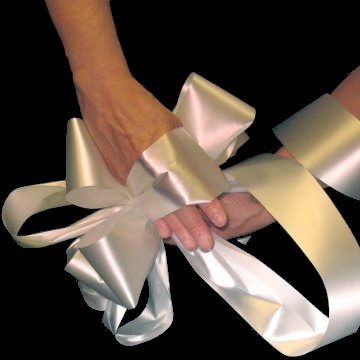
With all the loops pinched together by one hand, take your taped wire and fold over the twists.

Give the wire one twist to hold the ribbon. Now turn the RIBBON AND HOLD THE WIRE STILL. This will tighten the wire upward into the ribbon.
If you twist the wire instead of the bow, it will not tighten as well.
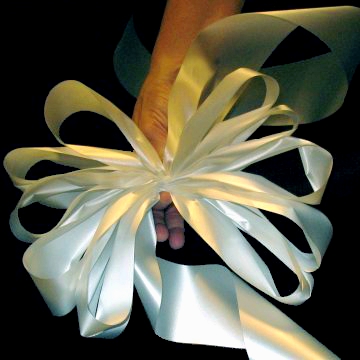
Now slide your hand into each loop and give a hard twist to the loop.
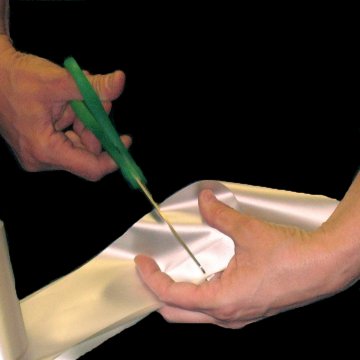
Twist each loop, pulling and tugging gently to spread the loops out. Clip each pew bow tail into either a "v" shape or on a slant.
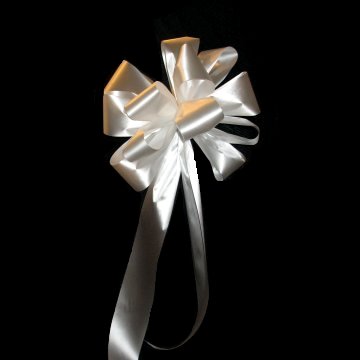
This is a photo of the finished church pew bow. One bolt of ribbon with 50 yards will make approximately ten large bows.